Japan’s most memorable photographs do not always come from its best-known viewpoints. Tokyo’s skyline, Kyoto’s temples and Mount Fuji deserve their reputation, but a distinctive image can also begin when you leave time to notice what lies between the major sights.
It may be rain darkening an old stone road in Hakone. It may be the grain of timber in a former post town, a few minutes of calm water beneath Mount Fuji, or wind drawing fresh lines across sand. Elsewhere, fishing boats sit close to people’s homes, while ancient burial mounds appear beyond working fields. These details give you more than a photograph. They help you understand the place itself.
The secret photography spots in Japan in this guide are not forbidden viewpoints or places known only to locals. They are destinations you can explore from public streets, permitted paths and authorised viewpoints. Although they receive less international attention than the country’s standard sightseeing icons, each gives photographers a clear reason to stop and look.
Some fit easily into the Golden Route between Tokyo and Osaka. Others reward a half-day detour or an extra night. You do not need to visit all nine. Choose the places that suit your route, season and photographic interests, then give yourself enough time to see what the light and weather bring.
What “Secret Photography Spots” Mean in Japan
“Secret” does not mean unknown, inaccessible or literally hidden. It means a place that receives less international attention than Japan’s standard sightseeing landmarks, yet offers a strong photographic reason to visit.
That distinction matters. A quiet rice field is not an invitation to cross a boundary. A narrow residential lane does not become a photography set because it looks appealing through a lens. Farms, fishing villages, temple grounds and historic streets remain places where people live, work and worship.
Instead of searching for somewhere nobody else has photographed, look for the reasons a landscape works visually. Side light can reveal the grain of timber. Wind can remove a reflection from a lake or create patterns across sand. A water channel can lead the eye through a town while also showing how that town developed.
The same principle applies throughout Japan: do not chase secret places simply because they are secret. Learn to recognise photographic places by understanding what you are looking at.
How to Choose the Right Photography Stop
You will usually gain more from two or three carefully chosen stops than from trying to photograph every place in this guide. Start with your route, then consider the type of image you would like to make.
A Golden Route stop: Yanaka and Nezu can fit into a Tokyo stay, while Hakone’s Old Tokaido Road adds a different perspective to a familiar Hakone visit.
A half-day detour: This works best when the photography stop is close to where you are staying. Asuka may suit a shorter excursion from a nearby base, while Gujo Hachiman and northern Kyoto can require a full day or an overnight stay. Allow time for the return journey as well as photography.
An overnight extension: Staying near Mount Fuji gives you a better chance of reaching Lake Tanuki in early light. A night in northern Kyoto gives you more freedom at Amanohashidate and Ine. A stay in Kyushu makes it possible to experience the night sky above the Aso-Kuju highlands.
Your equipment matters less than you may expect. Yanaka, Asuka and Narai-juku offer enough detail for a smartphone photographer. A longer lens can help at Lake Tanuki, Narai-juku and Ine. A tripod and some low-light experience become more useful for astrophotography.
Most importantly, do not treat poor weather as an automatic failure. Rain, mist, cloud and wind can remove one photographic possibility while creating another.
1. Yanaka and Nezu, Tokyo: Everyday Details Beyond the Skyline
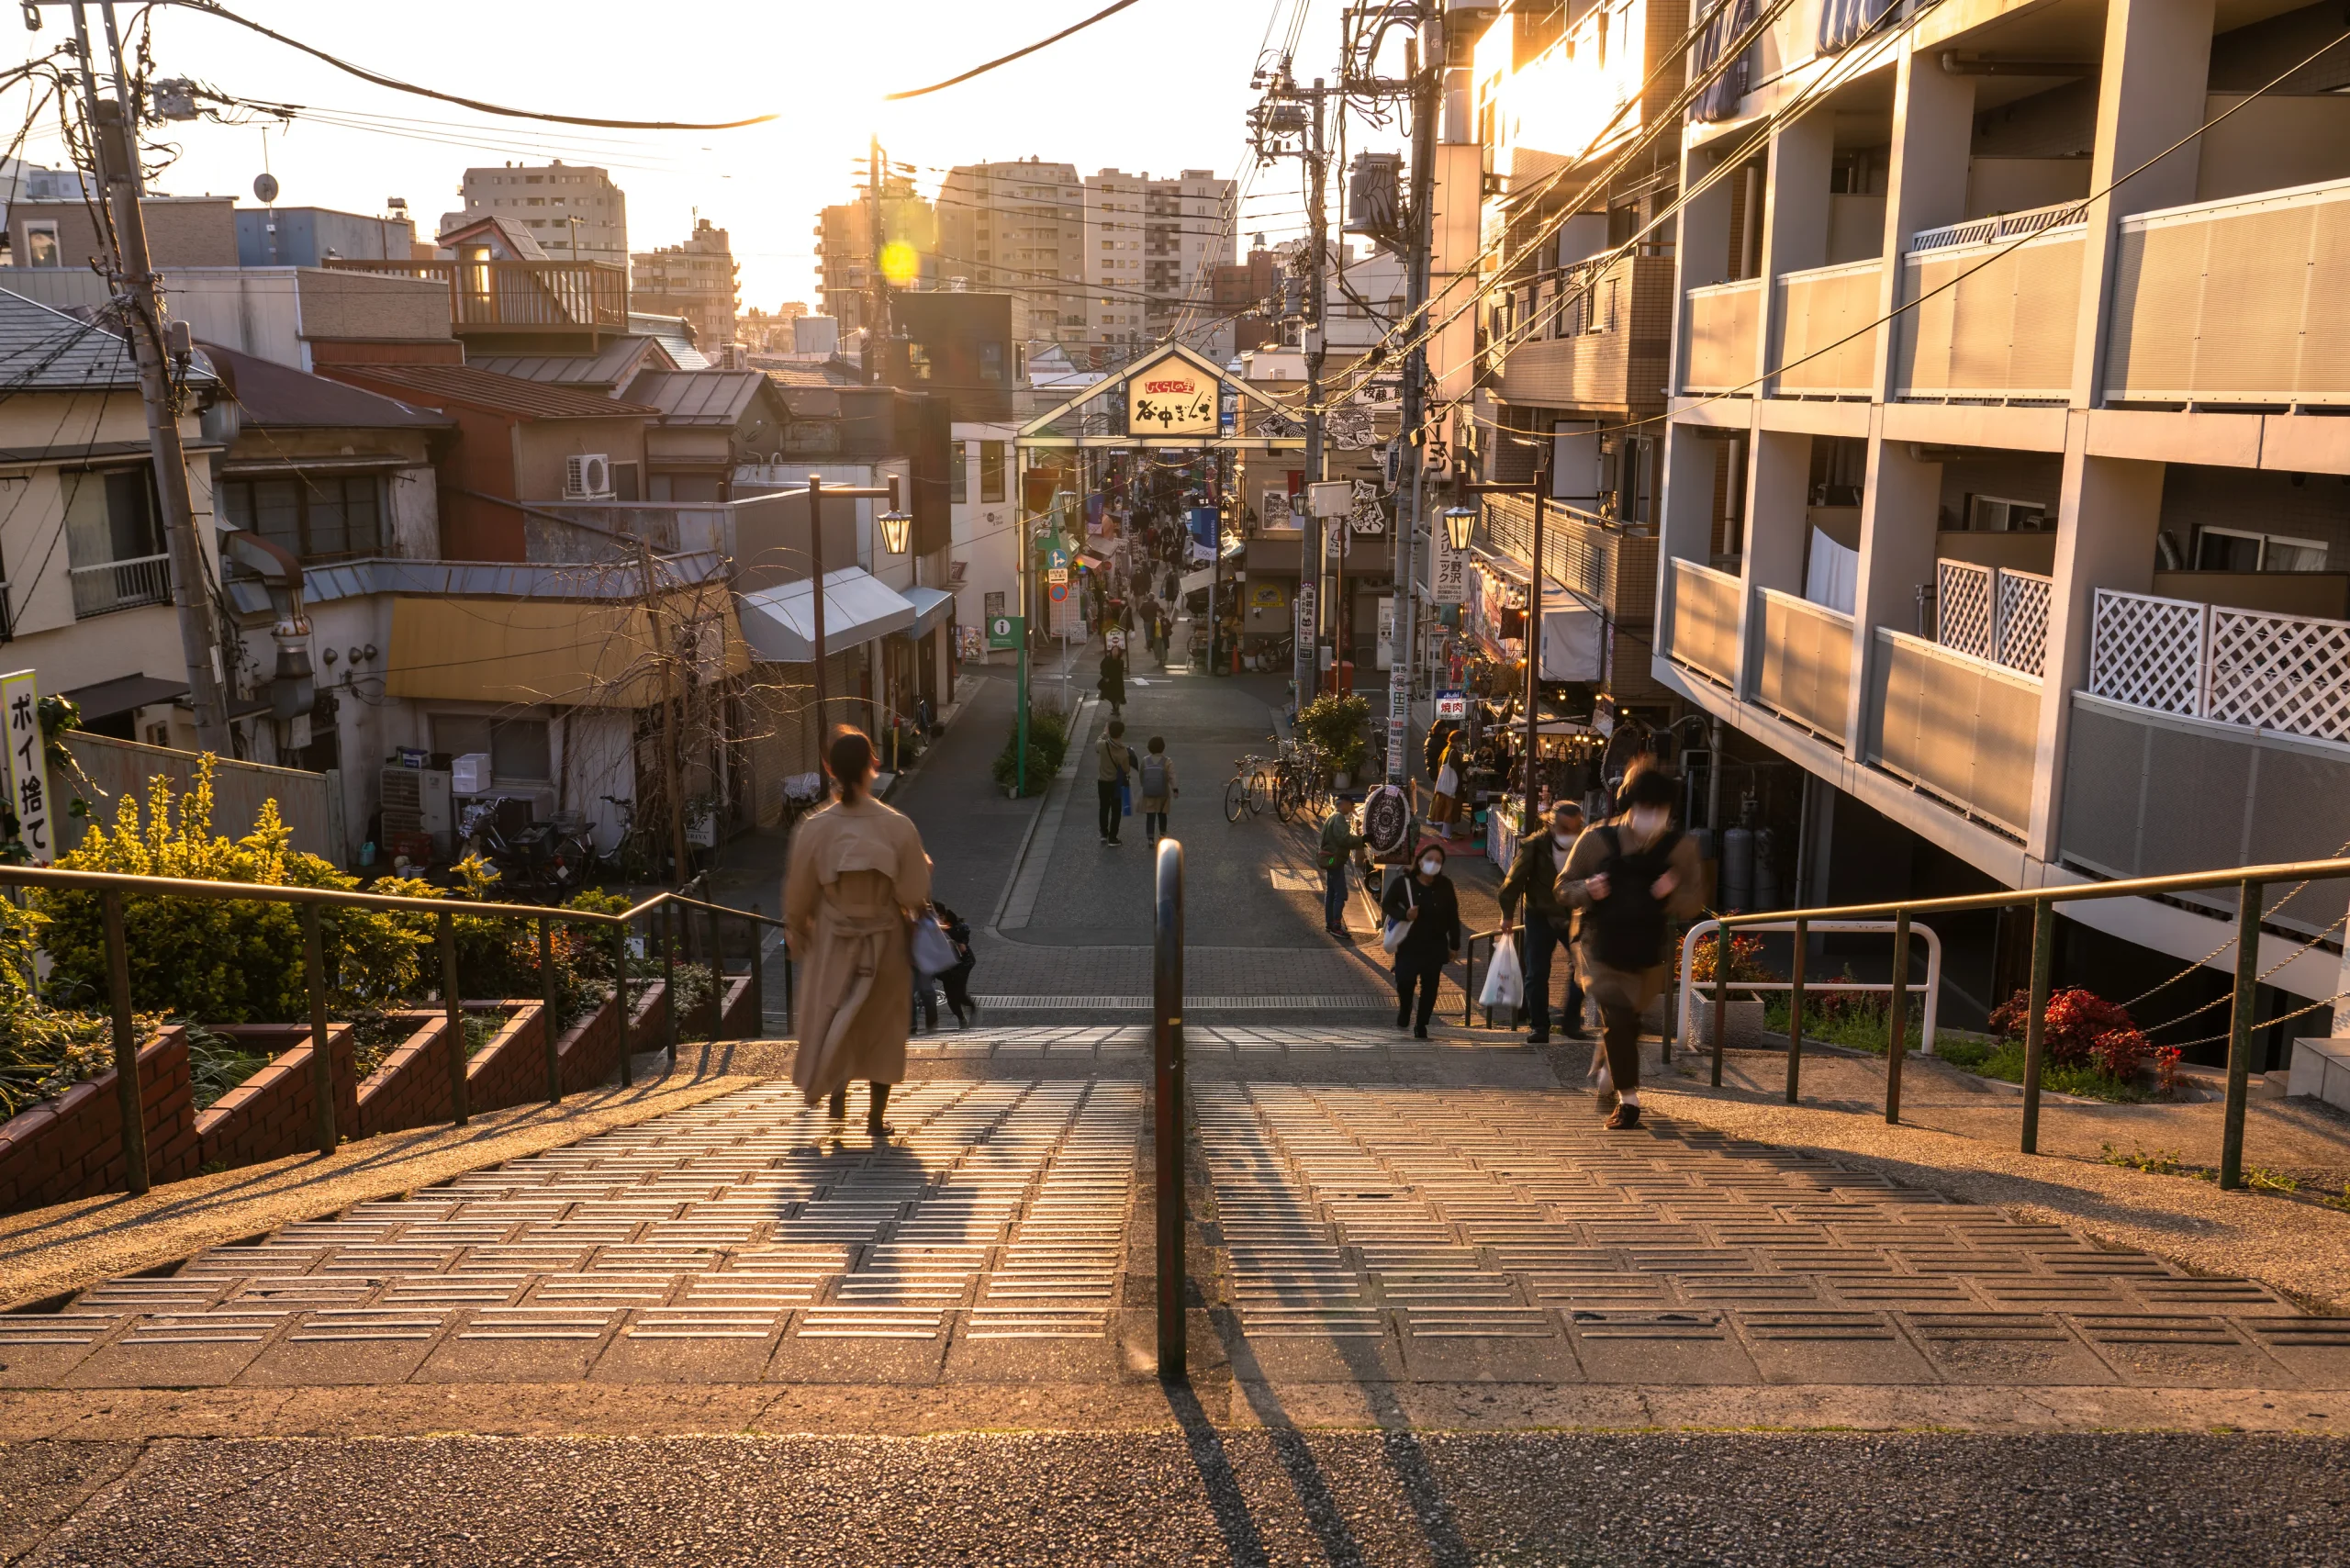
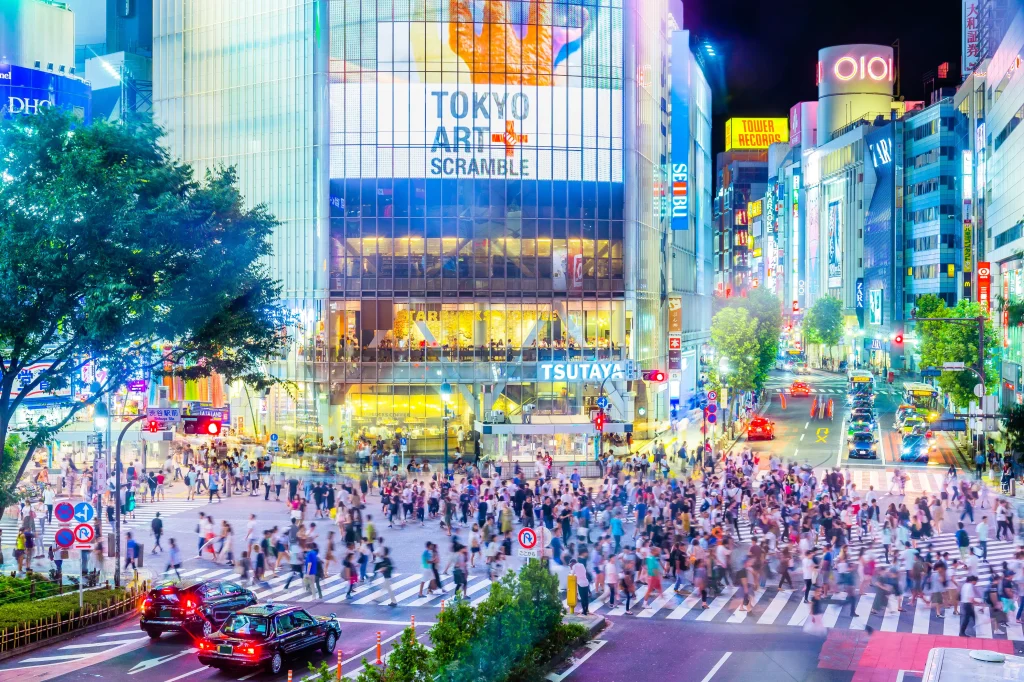
Yanaka and Nezu offer a useful change of scale after Tokyo’s towers, crossings and neon. Here, a photograph is often found in a roofline, a temple gate, a shop curtain or plants beside a narrow lane.
The wider Yanesen area—Yanaka, Nezu and Sendagi—is often associated with Tokyo’s shitamachi, the older low-lying districts known for small-scale streets, local shops and neighbourhood life. Temples, homes and independent businesses sit close together, creating a streetscape where historical details remain part of present-day Tokyo.
The area’s photographic interest comes from the coexistence of older and newer details. A tiled roof may stand above a modern café sign. A small temple gate may sit close to residential buildings. Near a temple entrance, you may notice a faint scent of incense alongside the everyday sounds of the neighbourhood. A row of potted plants can turn an ordinary lane into a scene with depth and rhythm.
Try not to fit an entire street into one frame. A section of wooden lattice, a noren—a fabric curtain hanging at a shop entrance—or a row of pots can create a foreground before the lane draws the eye deeper into the scene. With a smartphone, stepping backwards often improves the composition more than using digital zoom. With a camera, a moderate focal length can isolate repeating roofs, signs and architectural details.
Soft cloud or late-afternoon light works well because it reduces harsh contrast in narrow streets. However, Yanaka and Nezu are homes and workplaces, not open-air museums. Keep doorways clear, do not point your camera into homes, and ask before making a resident or shopkeeper the identifiable subject of a photograph.
2. Hakone’s Old Tokaido Road: Photograph a Route Made for Walking
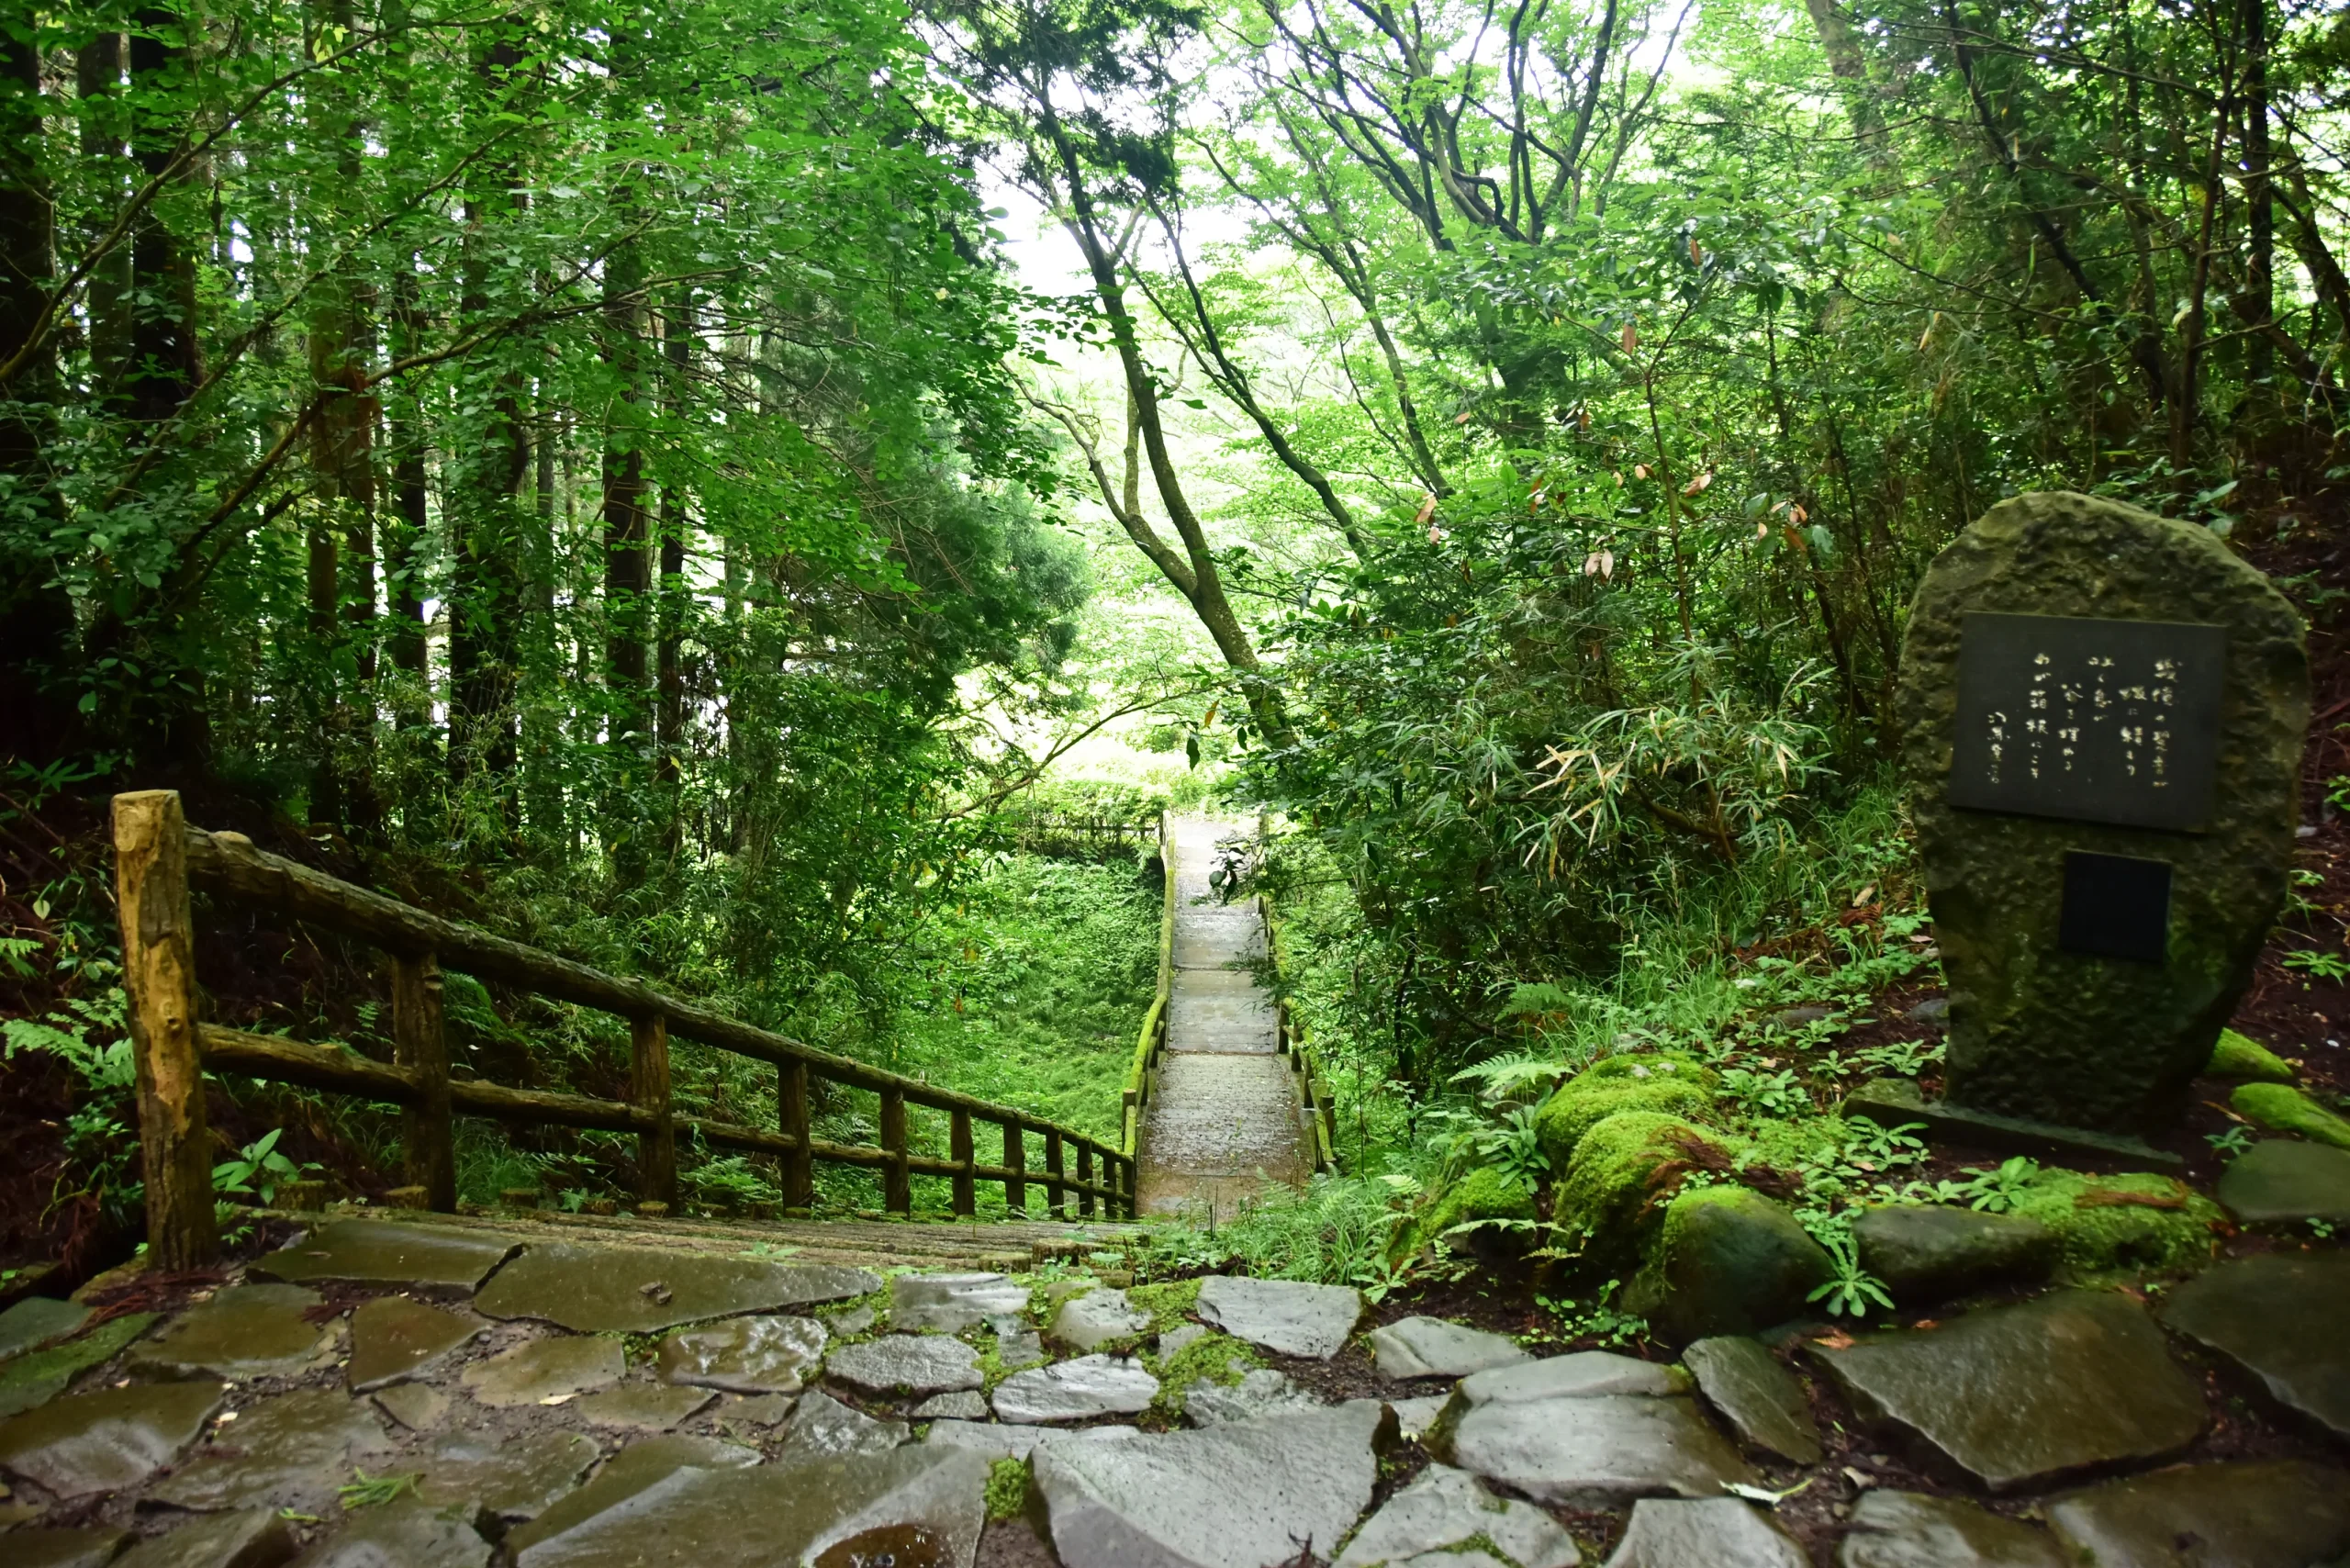
Hakone’s Old Tokaido Road is most rewarding when you photograph it as a route rather than simply as a historical object. Its stone paving, cedar trees and slopes show what travel once meant when crossing the mountains required physical effort.
The Tokaido was a major highway connecting Edo, now Tokyo, with Kyoto during the Edo period (1603–1868). Around Hakone, parts of the route retain historic stone paving and cedar-lined scenery. The road therefore represents both a landscape and a former system of travel between two political and cultural centres.
Rain or mist need not spoil the experience. Wet stone catches small areas of reflected light, while cedar trunks become darker and more distinct. Mist can gradually remove detail from the far end of the road, creating depth without the need for a dramatic viewpoint.
One simple composition is to include a walking figure at a distance. The person gives scale to both the trees and the road without becoming the main subject. You can also lower the camera slightly and use the uneven stone surface as a foreground leading into the frame.
If you are using a smartphone, place the path slightly away from the centre and allow the cedar trunks to frame both sides. More experienced photographers can photograph from a lower angle, but should do so only where it is safe and does not block the route.
Wet stones can be slippery. Wear shoes with good grip, watch your footing, and never place a tripod where it forces other walkers off the safe part of the path. The road is a historic landscape, but it is also a real walking route used by other visitors.
3. Lake Tanuki: Wait for Wind, Water and Mount Fuji
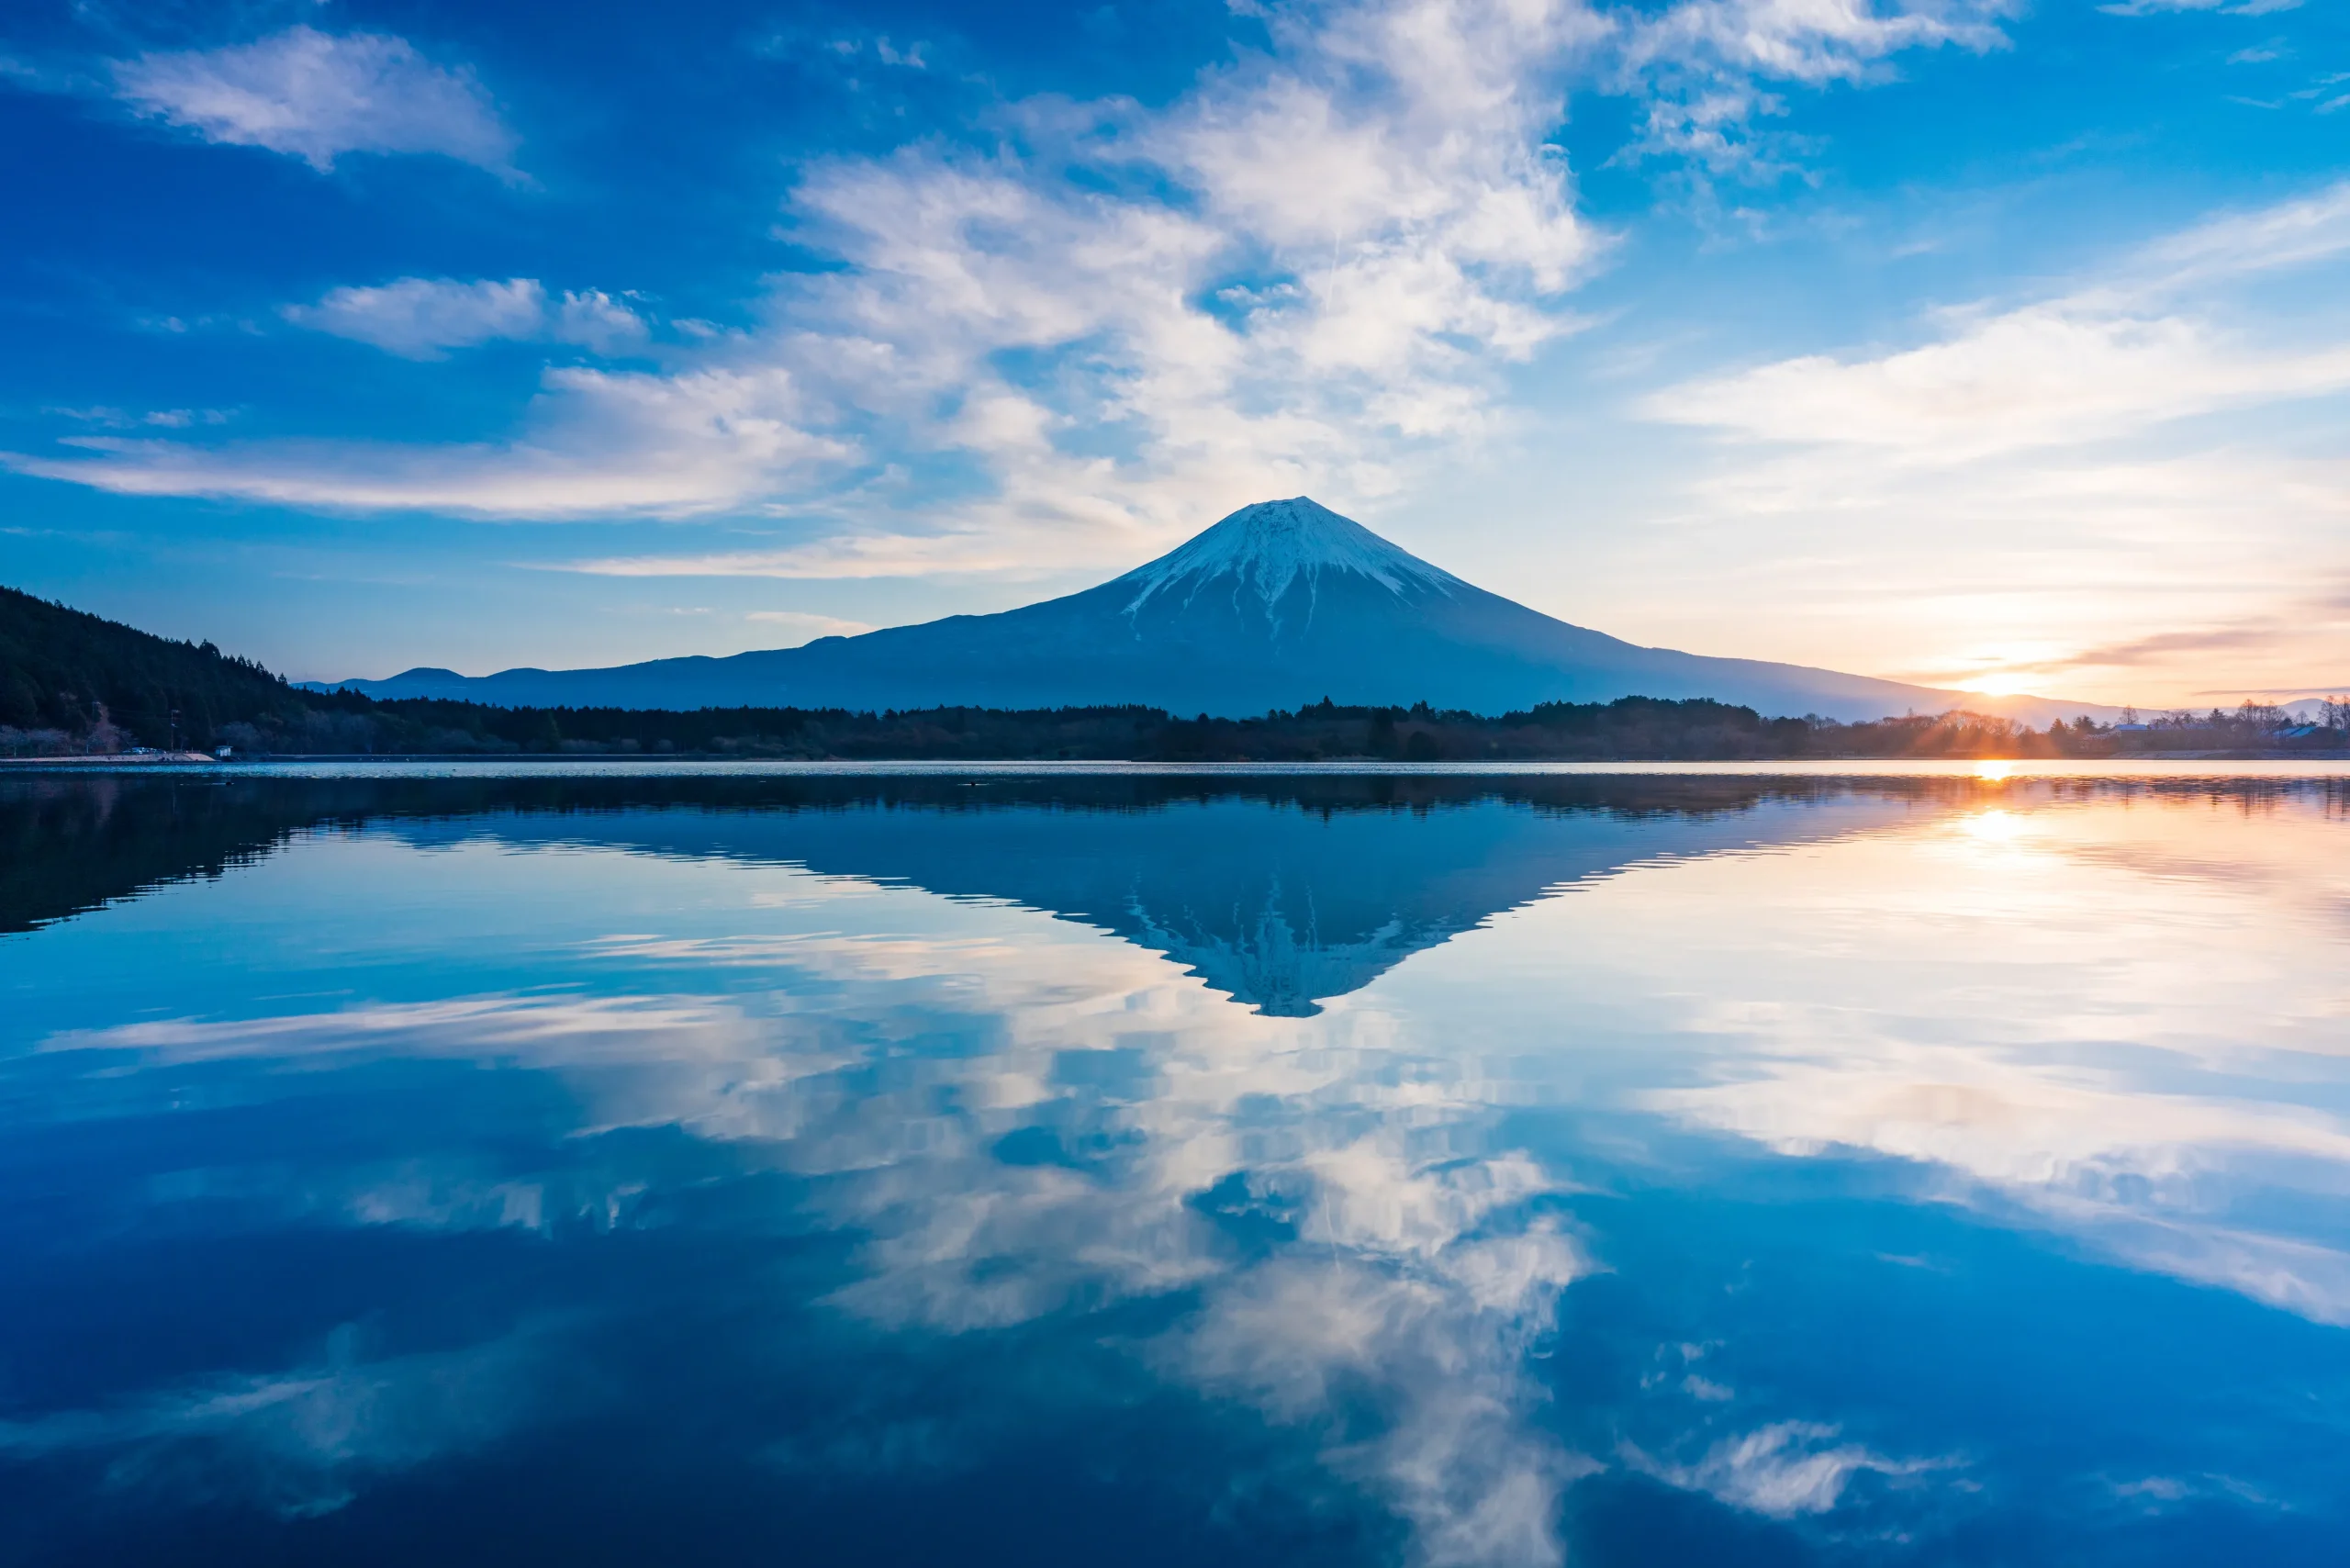
Lake Tanuki rewards patience because the photograph depends on conditions you cannot control. Mount Fuji may dominate the view, but wind, cloud and water determine what image you actually take home.
The lake lies on the Shizuoka side of Mount Fuji, within the wider Fuji-Hakone-Izu National Park area. Its open water makes it possible to photograph the mountain alongside reflections, shoreline vegetation and changing skies.
A mirrored Mount Fuji should be treated as a possibility rather than a promise. The well-known sakasa-Fuji, or upside-down Mount Fuji reflection, depends on calm water, clear enough visibility and a mountain that is not hidden by cloud. Even on a pleasant morning, the wind may disturb the surface or cloud may cover the summit.
Early morning can be worth the effort because conditions may be calmer. With a phone or wide lens, look for grass, trees or a simple lakeside feature to anchor the foreground. Avoid placing Mount Fuji alone in the centre of an otherwise empty frame. A longer focal length offers another approach: it can bring the shoreline, mountain and cloud layers closer together.
If Fuji remains hidden, keep looking. Low cloud moving across the foothills, changing tones on the water and mist above the lake can still make an image specific to that morning. This is the value of Lake Tanuki: it teaches you to photograph conditions, not just a landmark.
For serious Fuji photography, an overnight stay nearby is often more useful than forcing one brief viewpoint into a crowded day trip. If you arrive before sunrise, move quietly around nearby accommodation and camping facilities, and carry a light for lakeside paths.
4. Narai-juku: Read Time in Wood, Stone and Rain
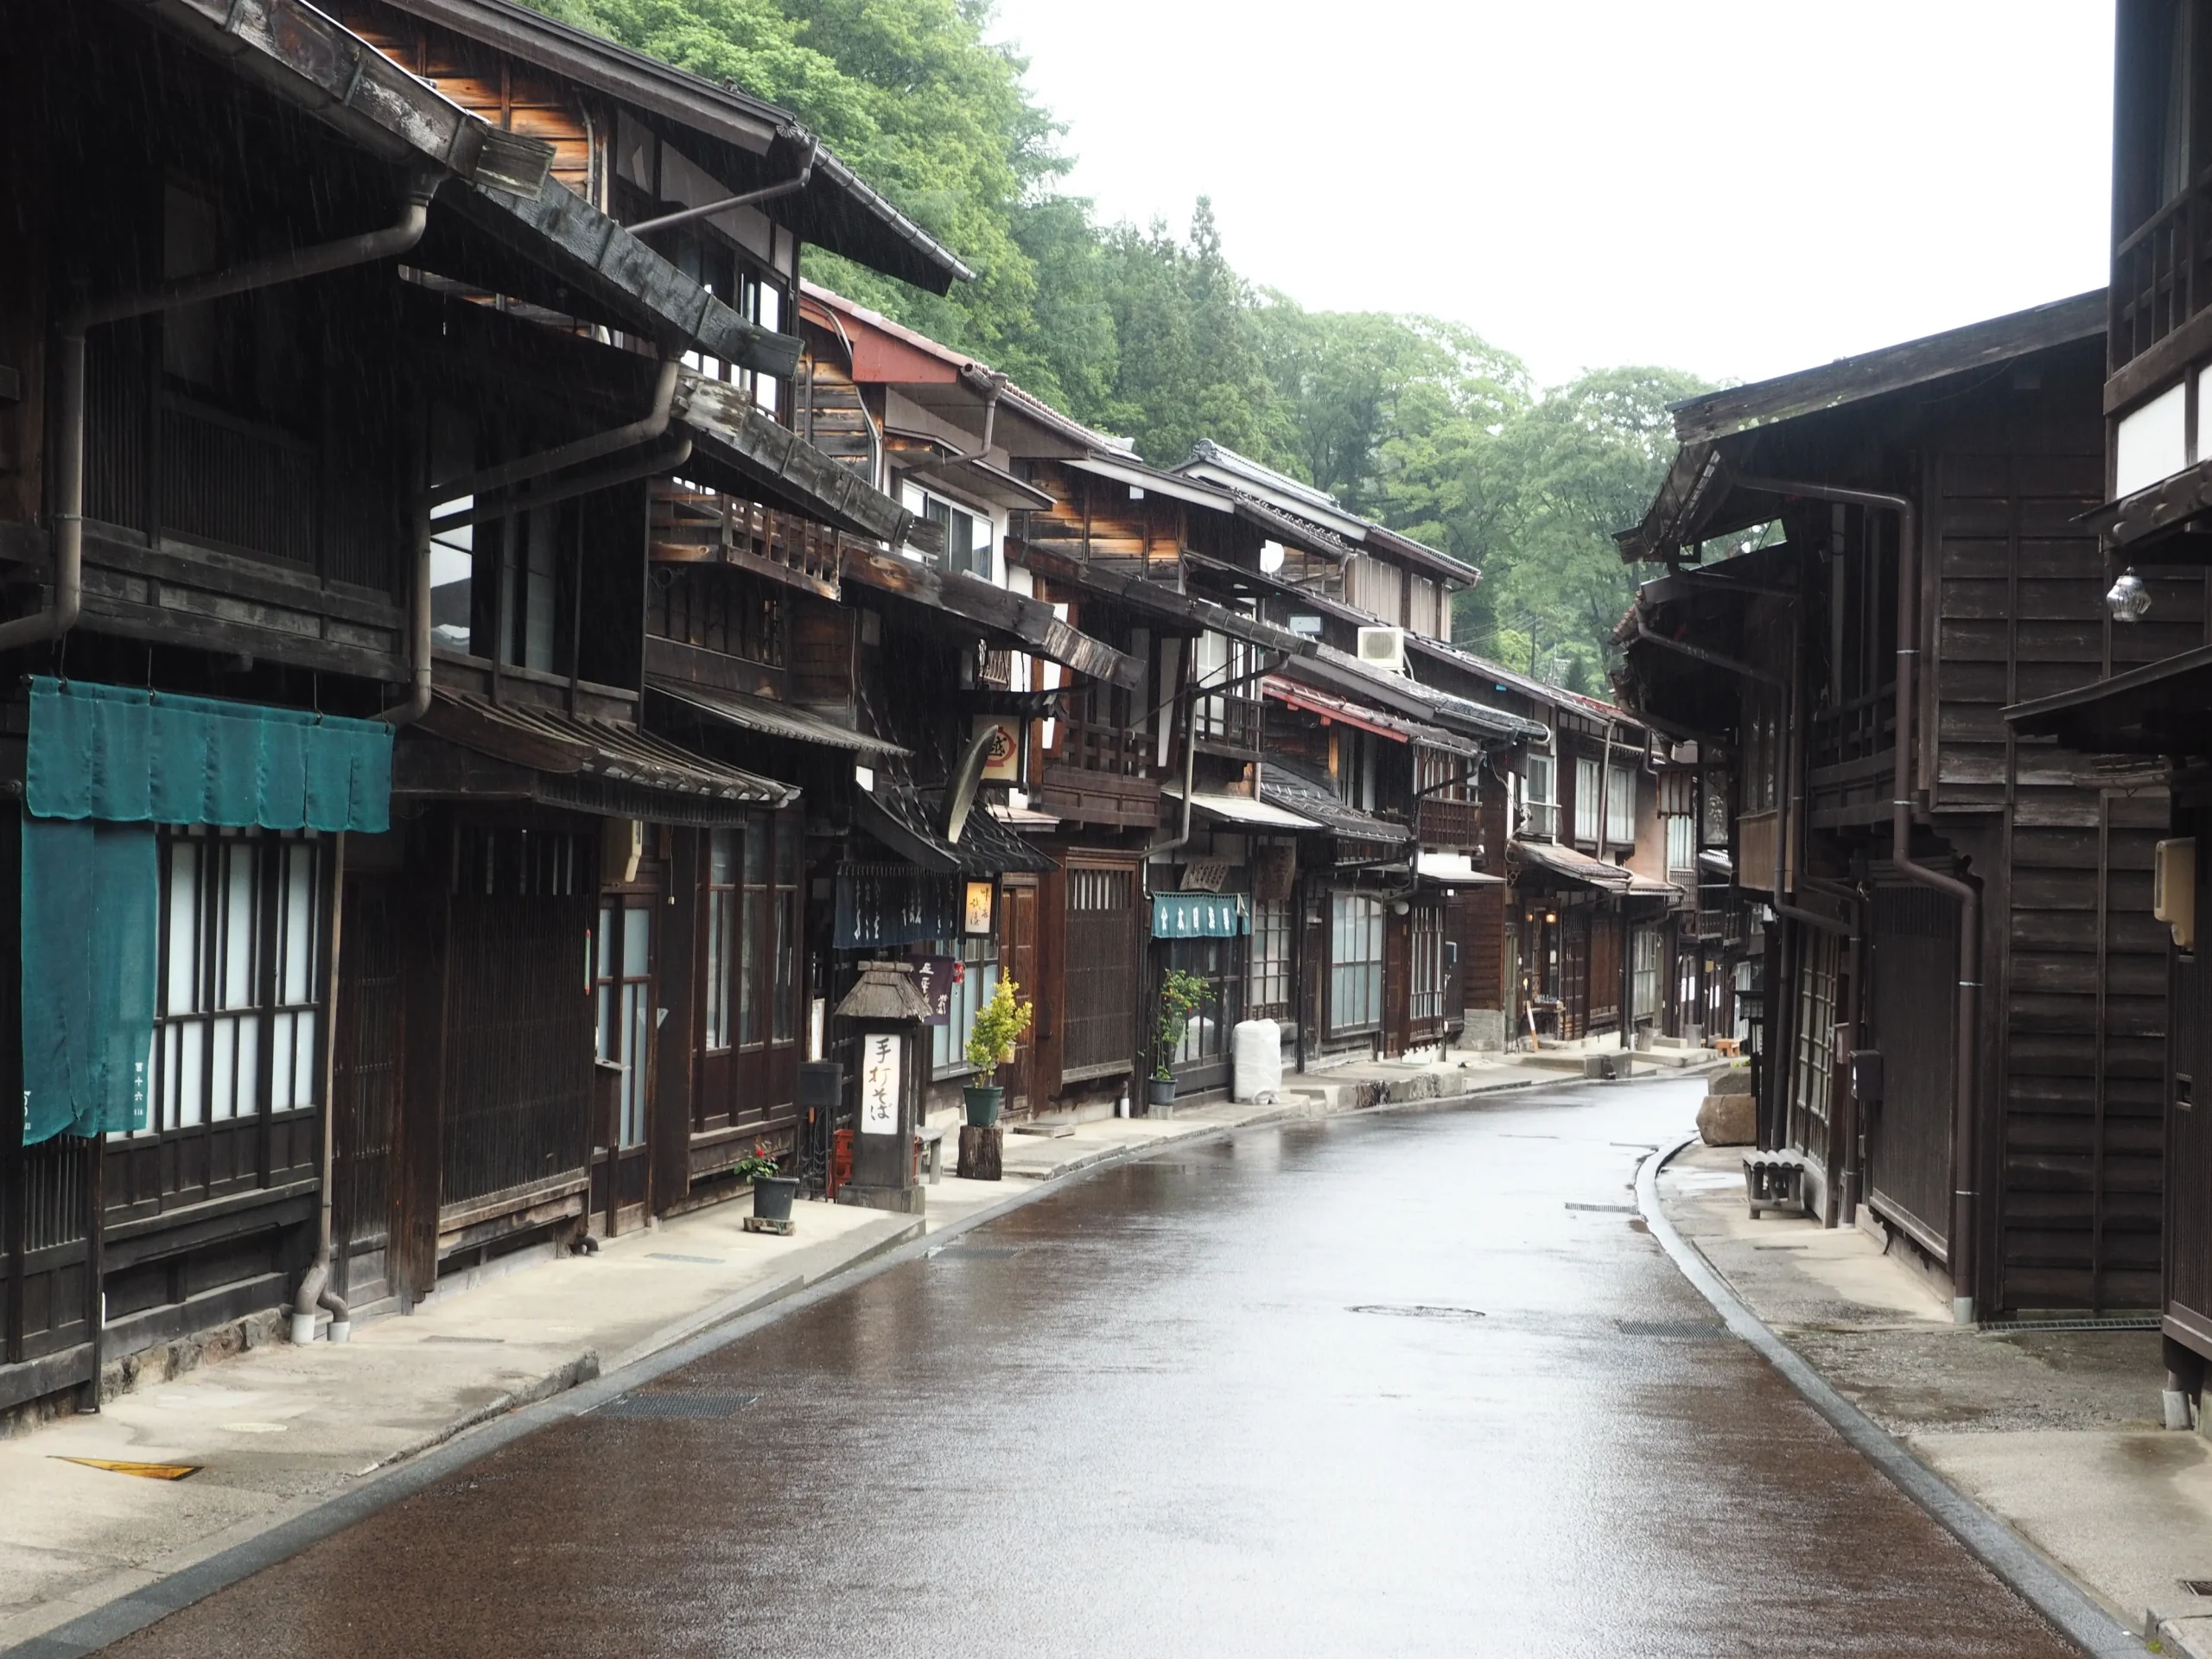
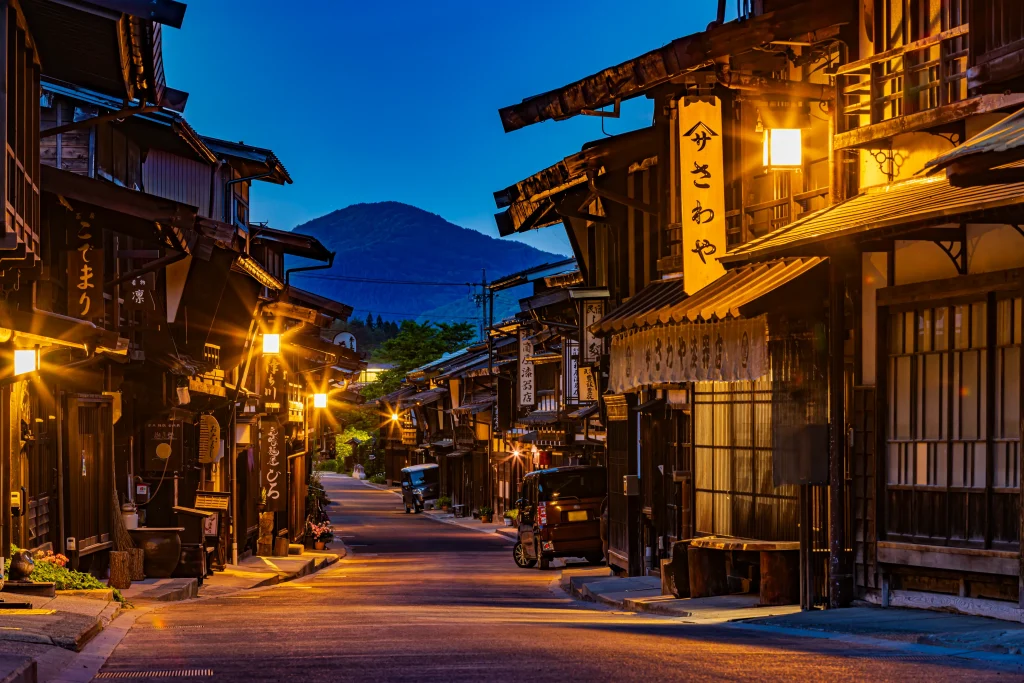
Narai-juku is best photographed at close range as well as from the middle of its historic street. Timber, latticework, eaves, signs and worn surfaces give this former post town its visual character.
A shukuba was a post town where travellers rested and stayed overnight along Edo-period highways. Narai developed on the Nakasendo, an inland route linking Edo and Kyoto. The townscape still conveys that history, but its smaller details often produce the more personal photographs.
Look closely at the grain of wooden boards, small changes in the surface of pillars, weathered signs and the repeated lines of projecting eaves. These marks matter because they show use over time, not because they make the town look old.
Rain can deepen the colour of timber and alter the texture of stone, sometimes bringing a faint scent of damp wood to the street. Overcast light can also make surfaces easier to photograph by reducing strong highlights and deep shadows beneath the roofs. A grey day is not a compromise here. It is often one of the best conditions for seeing material clearly.
A longer focal length, around 50–85mm equivalent, can bring roofs and the landscape behind them visually closer together. With a phone, use the line of an eave or building front to guide the eye towards open space further down the street.
Narai is not an abandoned historical set. People still live and work here. Give homes and shop entrances space. Do not lean on wooden pillars, place equipment on old surfaces or stand in the road with a tripod for long periods. The signs of age are meaningful precisely because the town continues to be used.
5. Gujo Hachiman: A Castle Town Shaped by Water
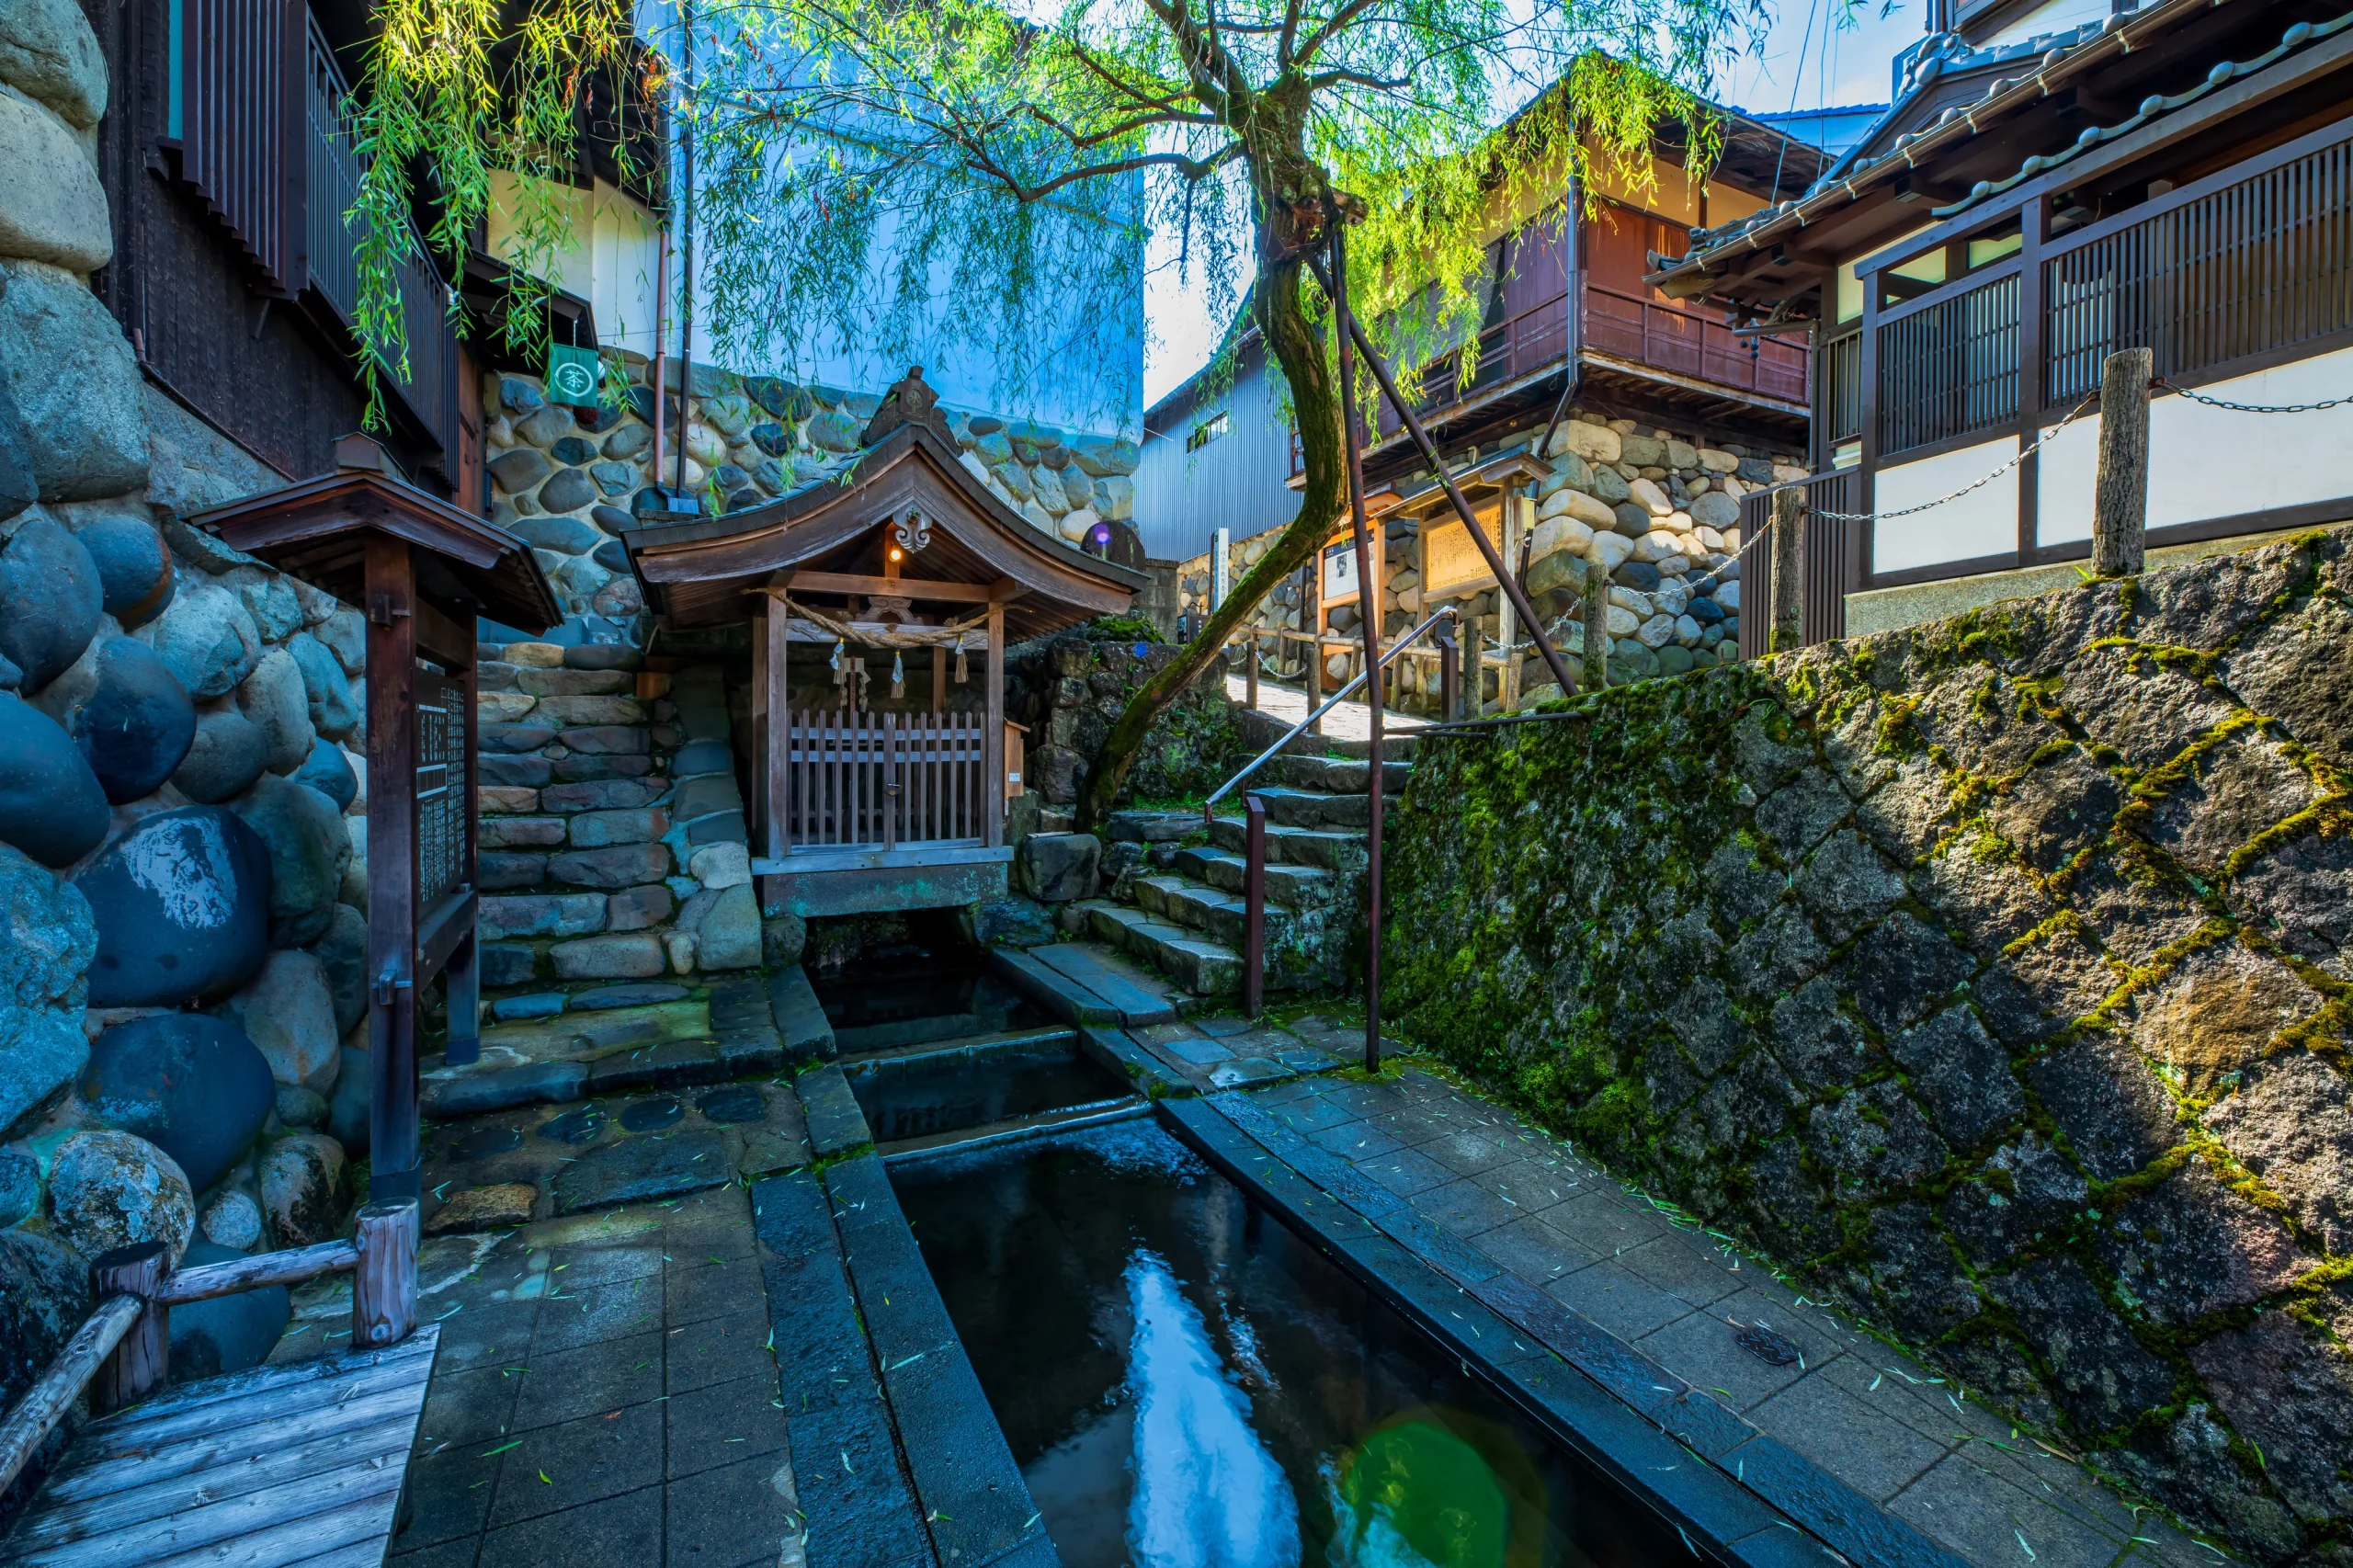
In Gujo Hachiman, water should be photographed as part of the town rather than as decoration. Channels, rivers, bridges, stonework and houses sit close together, often accompanied by the sound of flowing water. Together, they show how strongly water is woven into the settlement’s physical character.
Gujo Hachiman is often called a “Water City”. Its waterways have long been connected with everyday activities and the town’s management of water. That background changes the way you photograph the town. Instead of waiting only for a perfect reflection, follow the direction of the water through the frame.
A channel beneath a bridge can become a leading line. Stone walls can add texture beside moving water. Railings and house fronts can create patterns above it. Strong summer light can be useful because deep shadows from buildings contrast with bright, moving water. Under cloud, the quieter differences between wet stone, timber and the water’s surface become easier to see.
A simple approach is to photograph across a bridge at a slight angle, allowing the channel to lead into the distance. More experienced photographers may use a polarising filter to change the balance between surface reflection and what is visible beneath the water. Neither result is automatically better; choose the one that tells the clearer story.
Many waterways and lanes are part of everyday circulation. Do not block a bridge or narrow road with a tripod, and give residents priority over the photograph.
6. Amanohashidate and Ine: Where Pine, Sea and Daily Work Meet
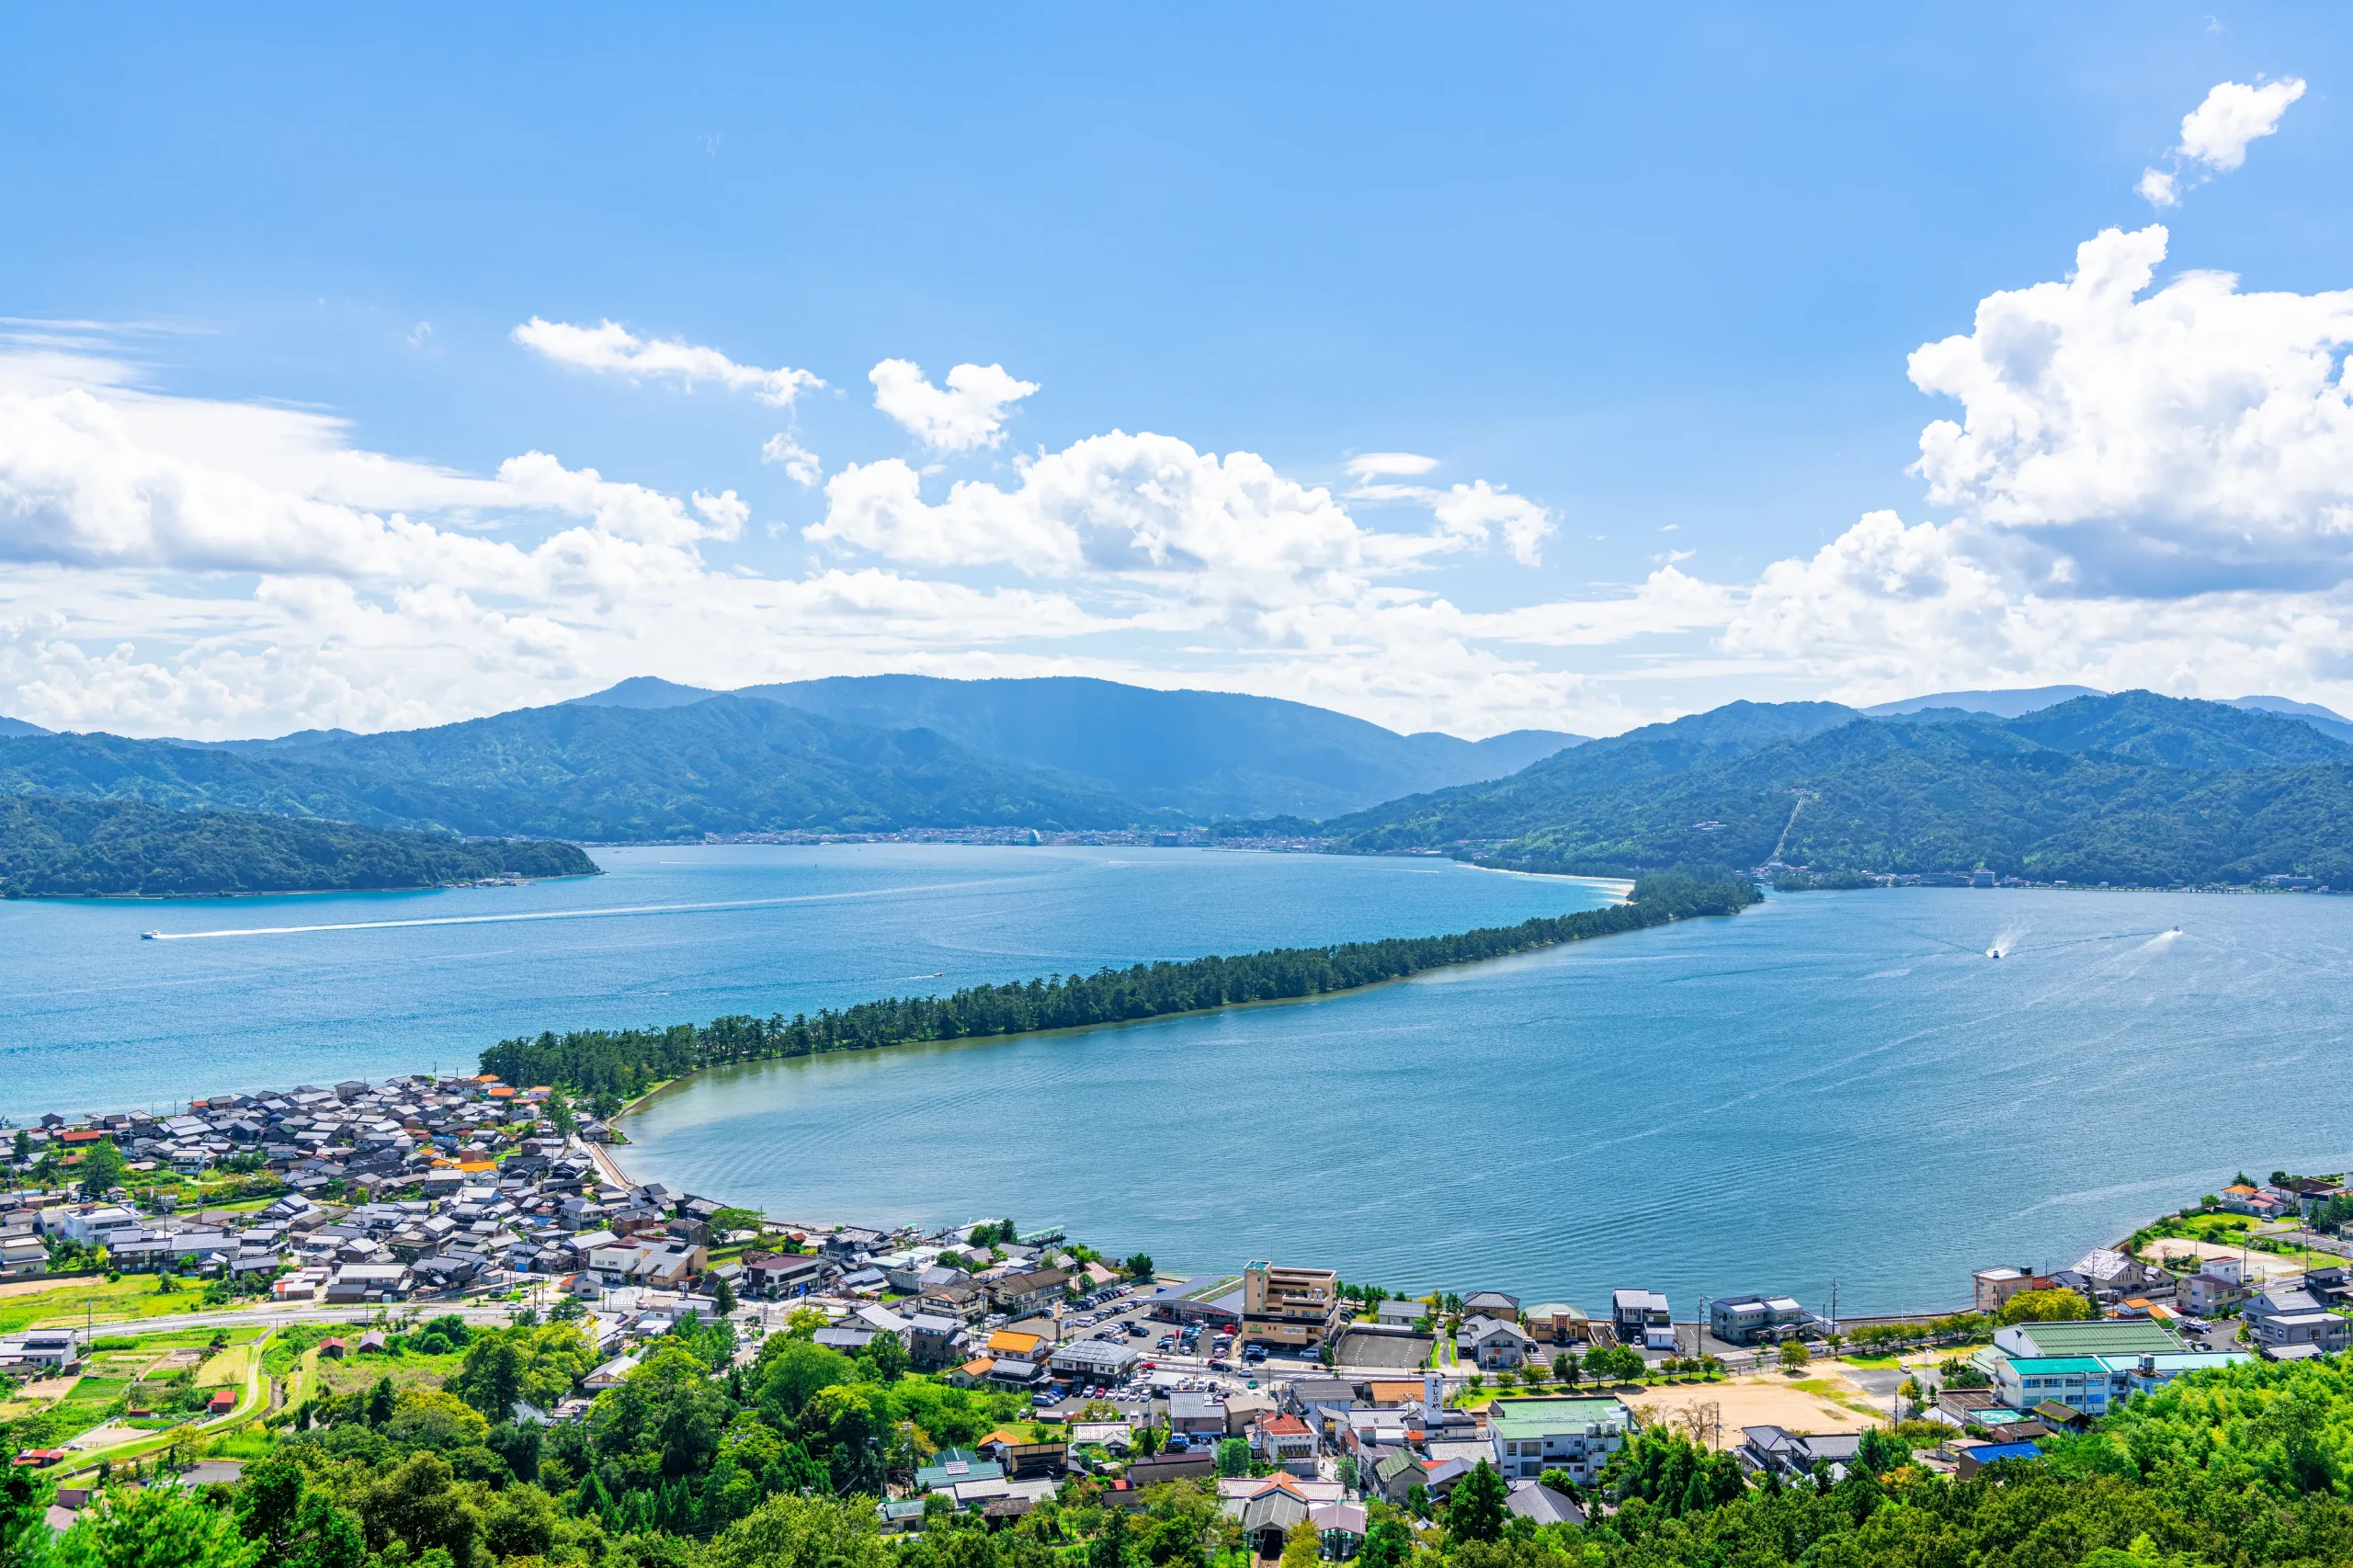
Northern Kyoto Prefecture provides two contrasting ways to photograph Japan’s relationship with the sea. Amanohashidate is about understanding a landscape at scale. Nearby Ine brings the camera closer to boats, buildings and working life.
Amanohashidate: Photograph the Shape of the Coast
Amanohashidate is a pine-covered sandbar crossing part of Miyazu Bay. It is one of Japan’s Three Scenic Views, a traditional group of three celebrated landscapes.
A higher viewpoint explains why the site became famous. Rather than treating it as a simple panorama, look at the curve of the coastline, the narrow dark line of pines and the different bodies of water around it. Cloud and the angle of sunlight can change both the colour and apparent shape of the bay.
This is a place where composition begins with geography. Give the sandbar enough space in the frame for its form to remain clear. A close photograph of a single pine may be attractive, but it does not communicate what makes Amanohashidate distinct.
Ine: Photograph Boathouses as Part of a Working Village
Ine needs a different approach because its funaya, or boathouses, belong to a living coastal community. Around Ine Bay, approximately 230 funaya were originally built to lift wooden fishing boats from the sea and protect them from rain, insects and rot. Many continue to be used as living and working spaces today.
Rather than isolating one building as a picturesque object, look at the relationship between boathouses, boats, water and the steep hills behind them. A longer lens can compress these layers. A simpler phone composition may use a boat or roof edge as foreground, leaving the rest of the village less crowded.
Ine is a functioning fishing village. The funaya, their entrances and the land around them are private property unless a resident or authorised facility invites visitors in. Keep your distance from working areas. Do not step onto a mooring or slipway, and do not seek an empty-looking photograph at the expense of the people who live and work there.
Amanohashidate and Ine can be visited from Kyoto, but staying in northern Kyoto gives photographers more freedom to work with early or late light.
7. Asuka Village: Ancient Japan in a Living Rural Landscape
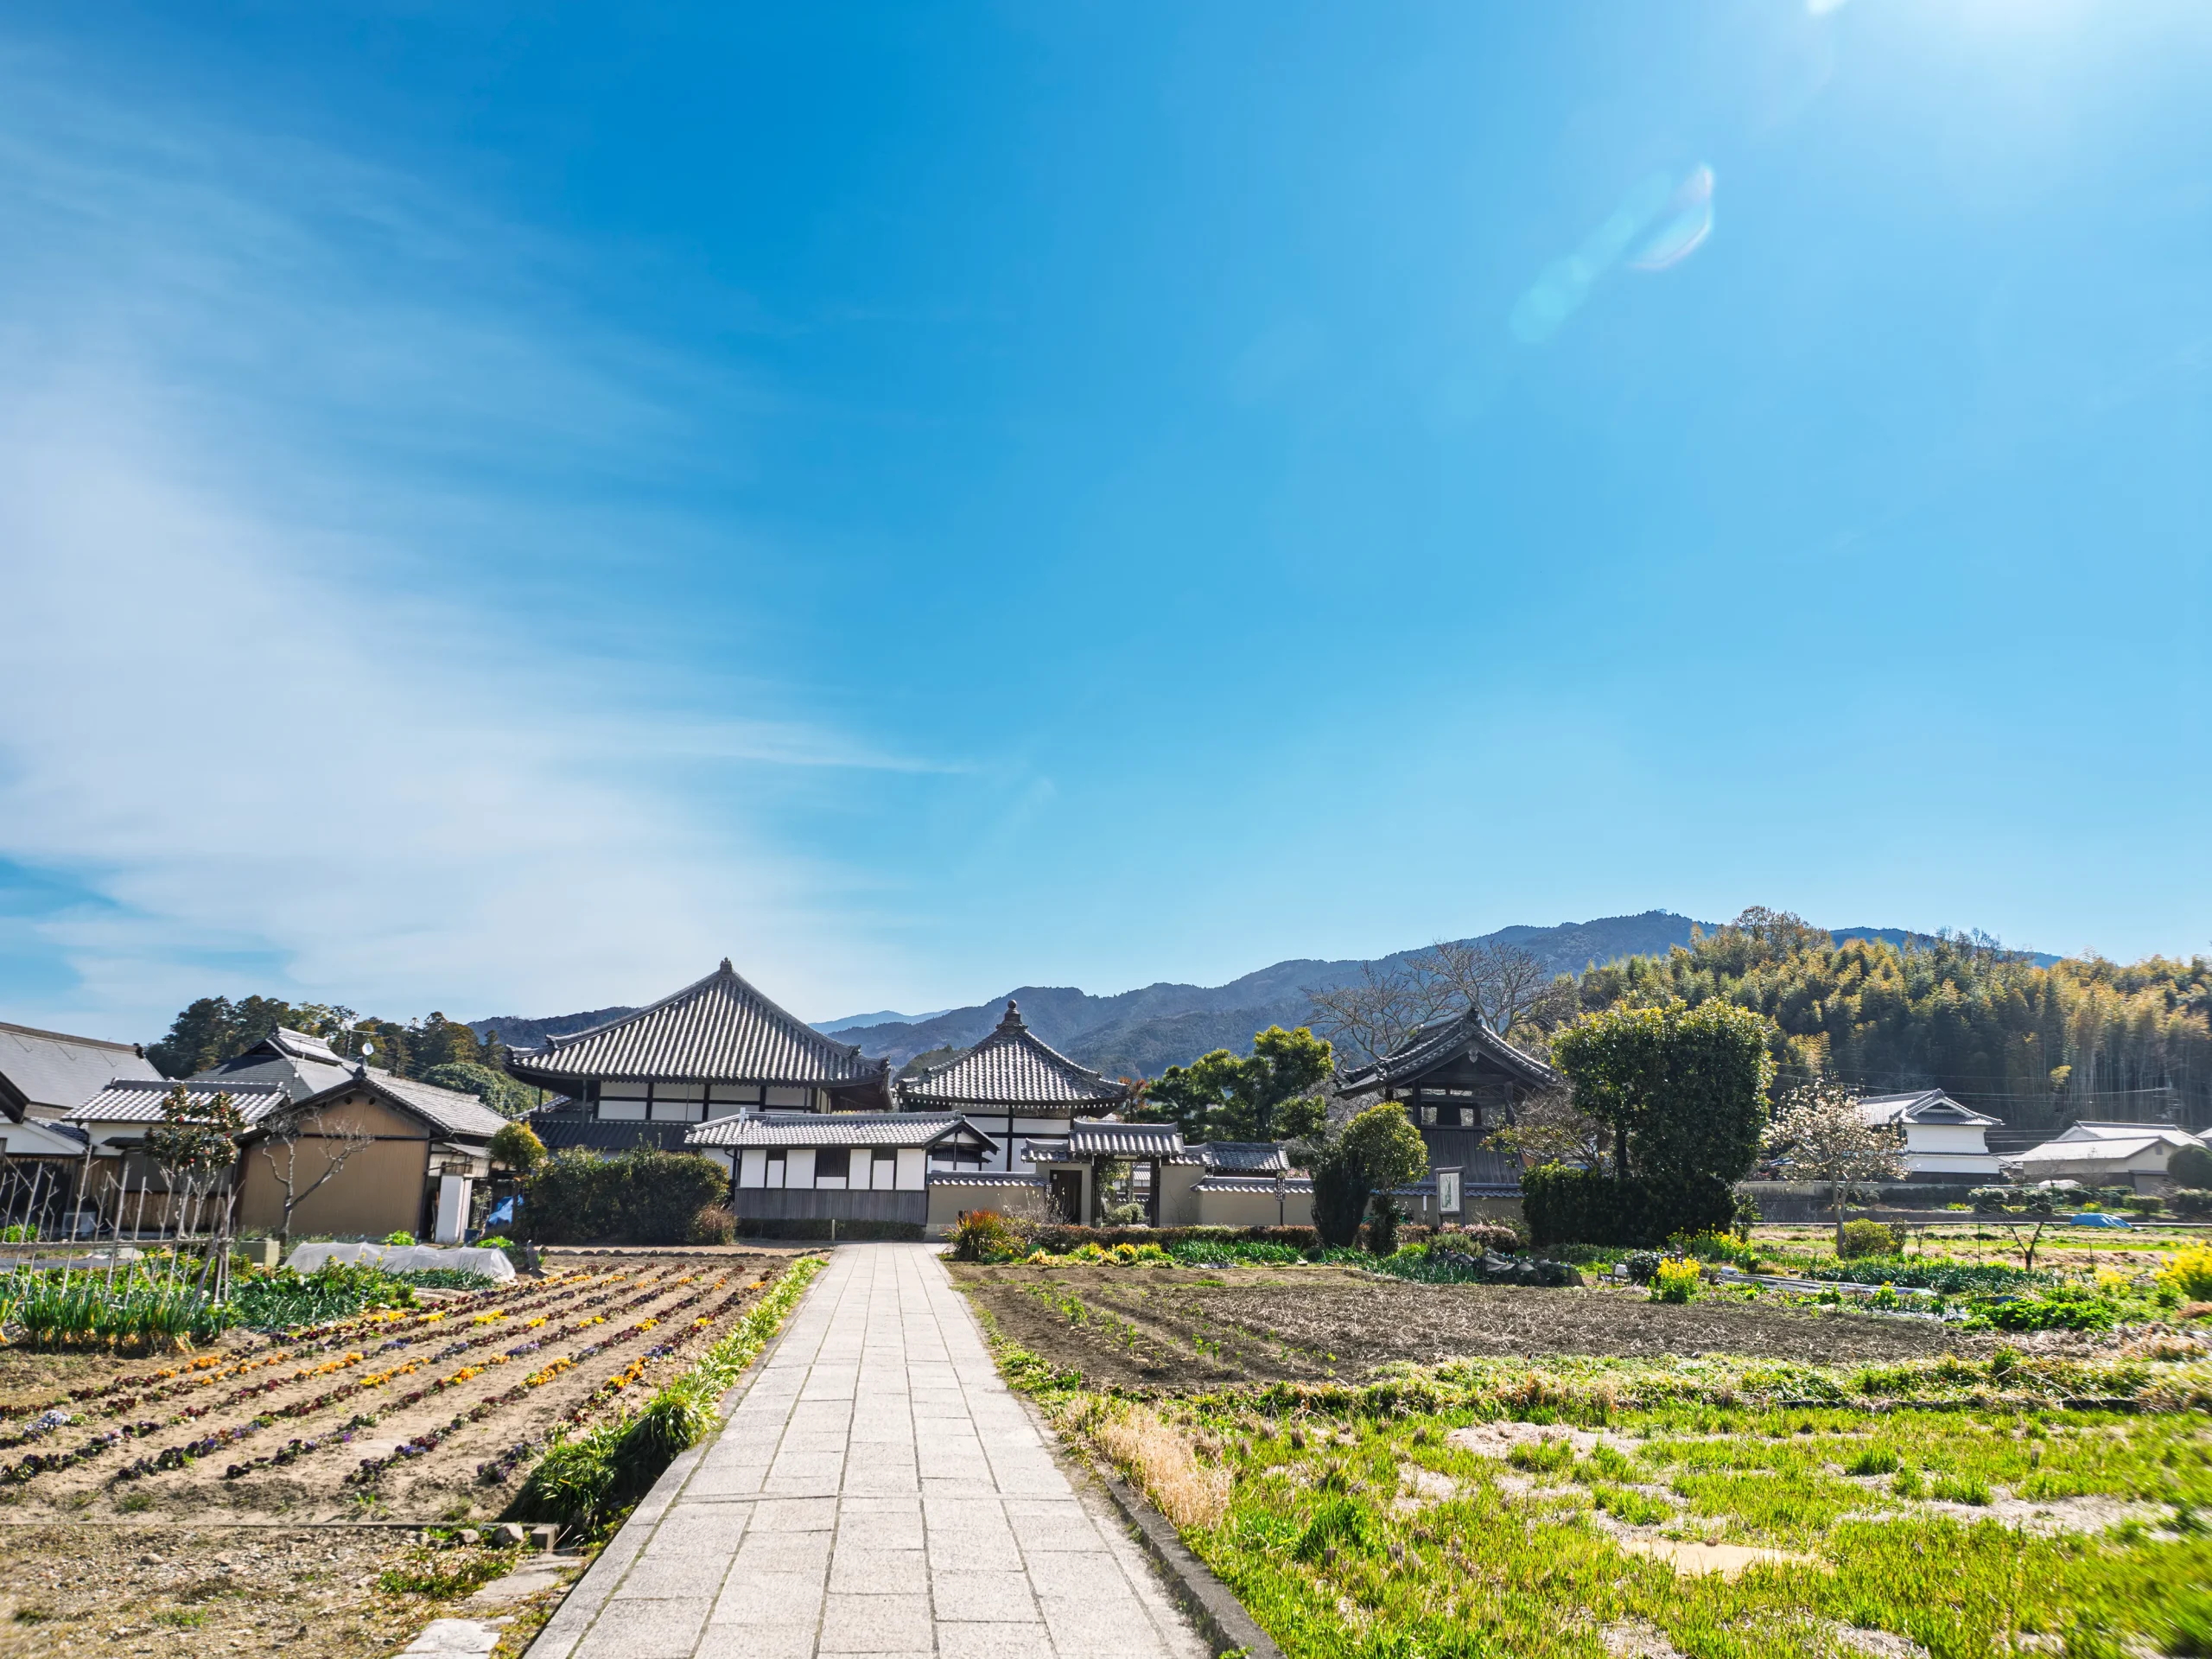
Asuka is not a destination where every historic feature fits into one spectacular frame. Its appeal is quieter: archaeological sites appear among working fields, village roads and low hills as you move through the landscape.
The area played an important role in the sixth and seventh centuries, when political institutions and Buddhist culture developed rapidly. Burial mounds, stone monuments, temples and archaeological sites remain scattered through a rural landscape that continues to be farmed and inhabited.
That mixture makes walking or cycling part of the photographic process. A burial mound may appear beyond a field. A stone monument may stand near a road. Another turn may reveal cultivated land with low hills behind it. The photograph becomes a record of how different periods occupy the same wider landscape.
Avoid trying to force rice fields, stone monuments, burial mounds and mountains into every frame. Choose one historical element and give it enough surrounding landscape to establish context. A stone marker in the foreground, with fields and low hills behind it, often communicates more than a crowded panorama.
Lower morning or evening light can create small shadows across stone, grass and uneven ground. These shadows help define modest features that may disappear under midday light.
Fields and irrigation channels remain working agricultural infrastructure. Stay on permitted routes, avoid narrow field tracks unless clearly open to visitors, and never step into crops for a cleaner angle. The landscape is valuable because it supports both history and present-day life.
8. Tottori Sand Dunes: Let Wind and Low Light Shape the Frame
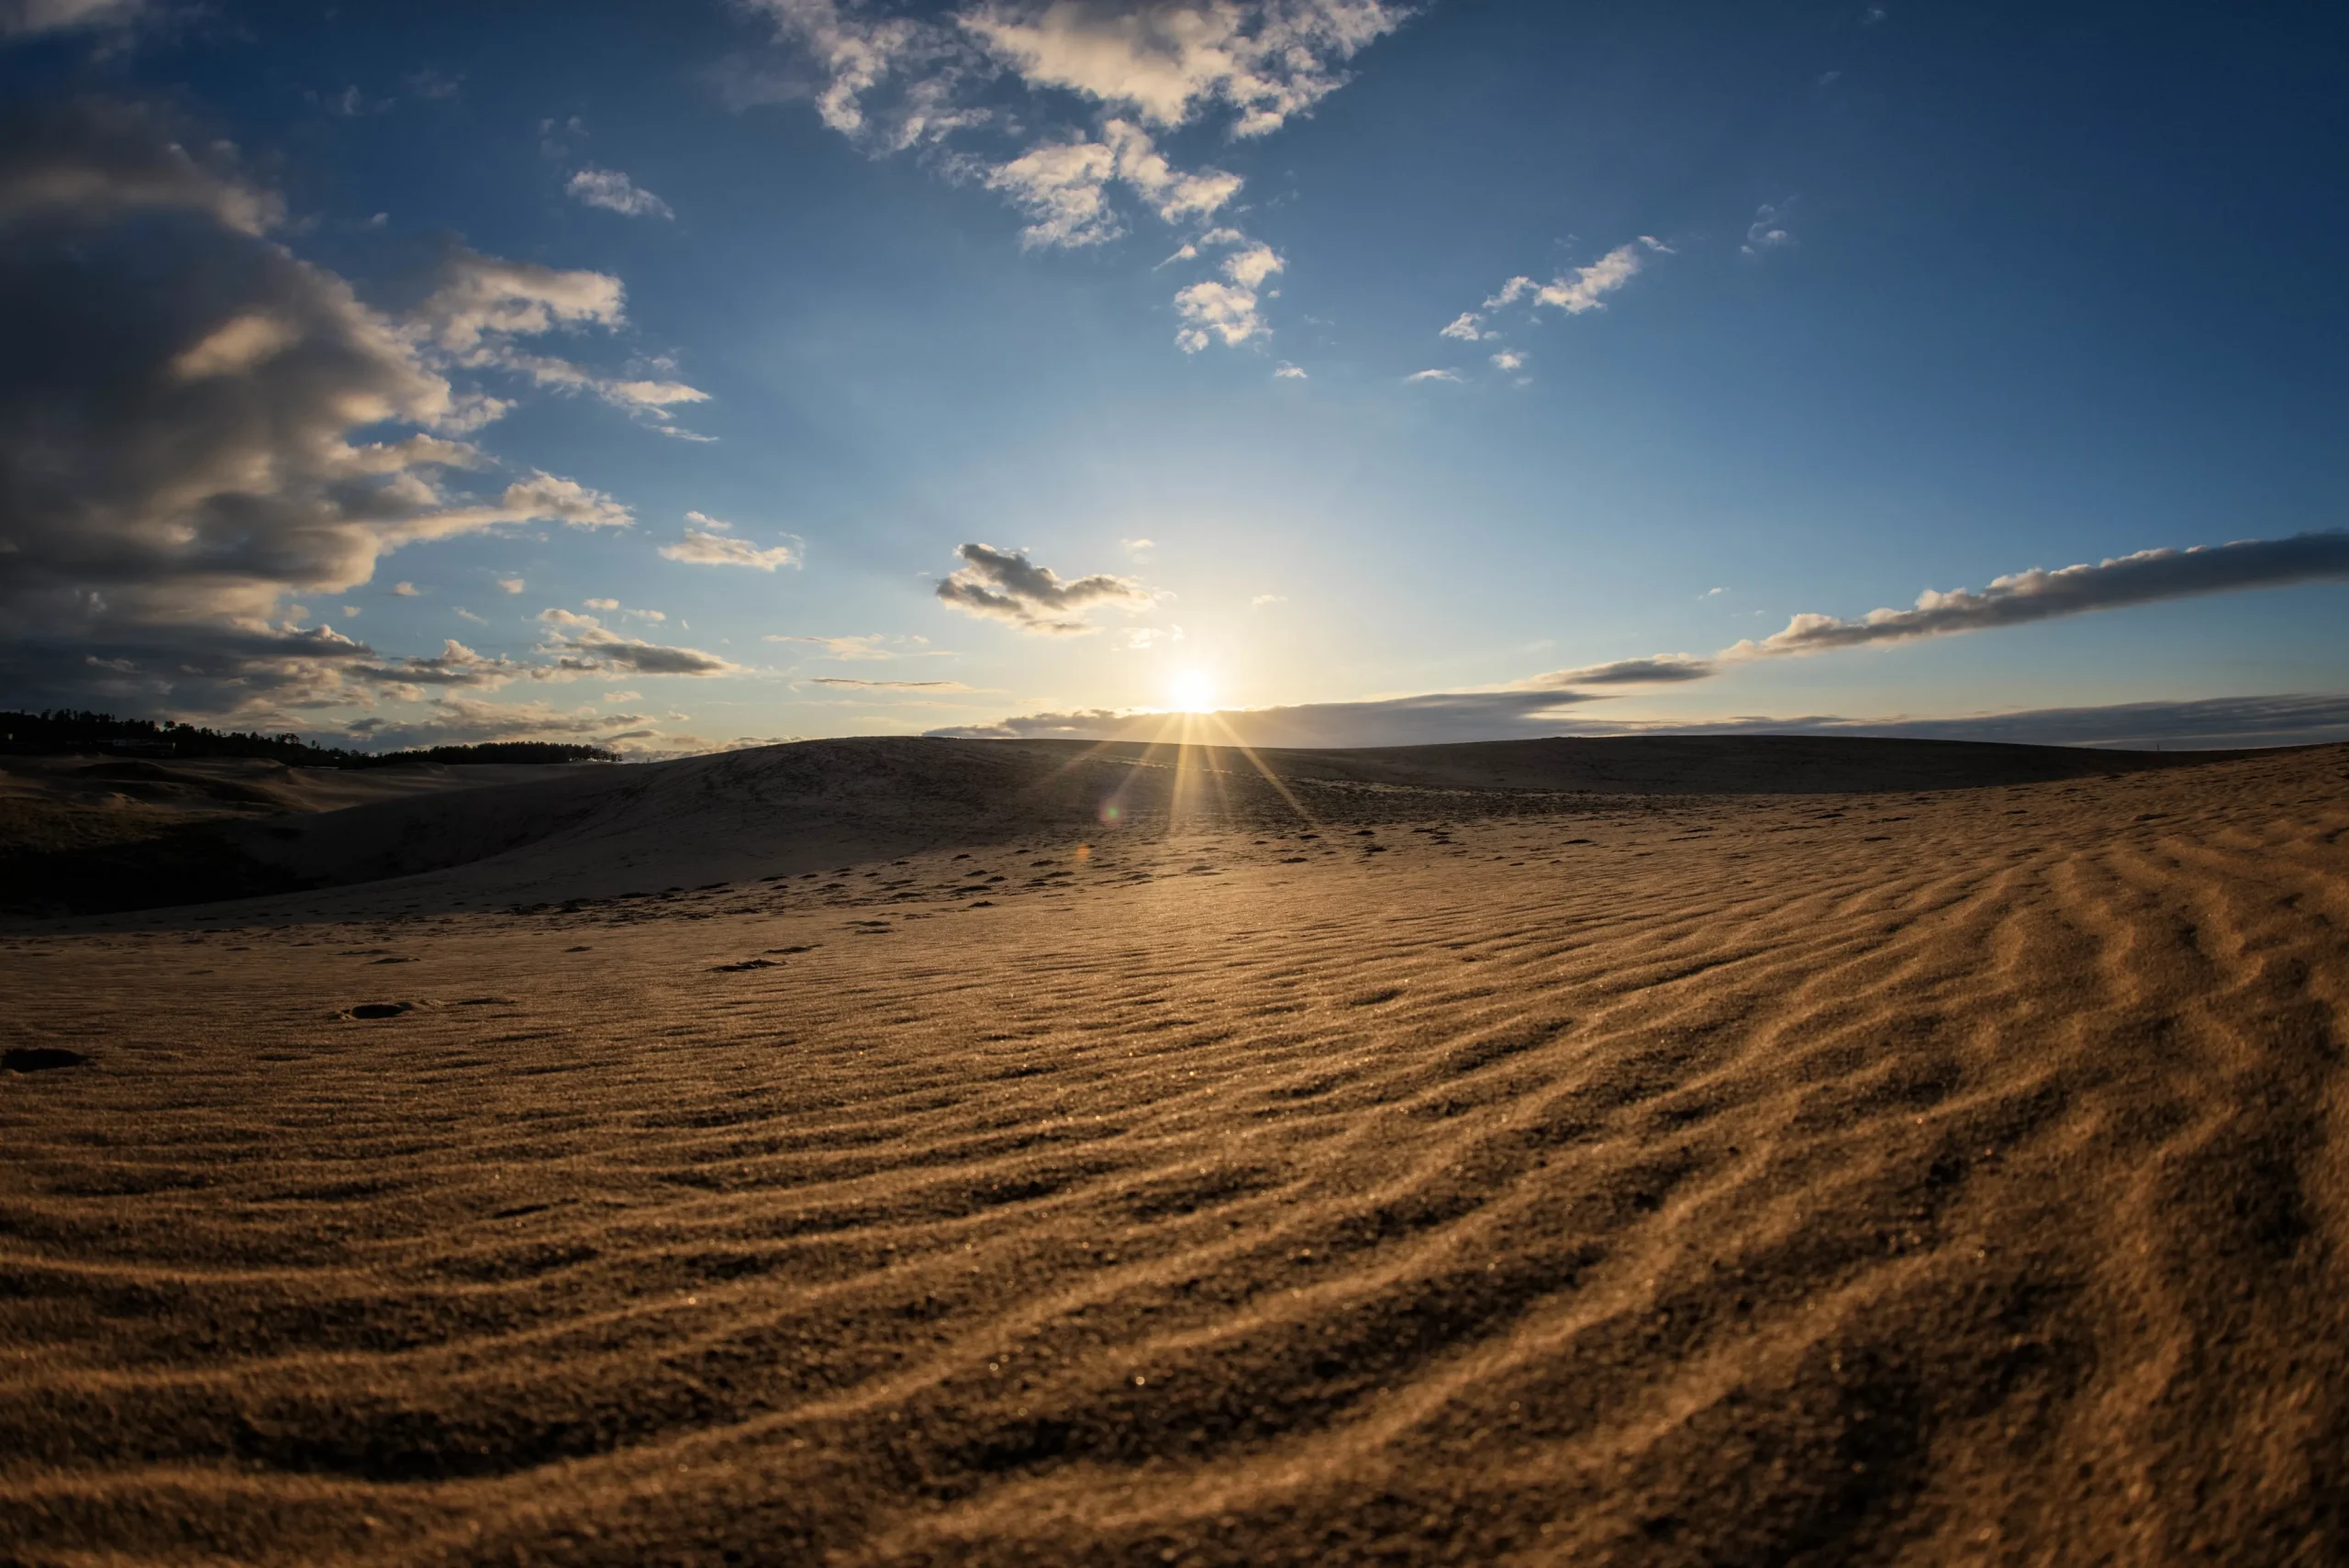
Tottori Sand Dunes offer the most visually minimal landscape in this guide. Here, removing elements from the composition can be more effective than adding them.
The dunes stretch along the Sea of Japan coast and form part of the San’in Kaigan National Park landscape. Wind continues to reshape their surface, creating ridges and fine patterns in the sand.
The main subjects are wind ripples, dune ridges, long shadows and distant sea. Wind ripples are the small wave-like patterns created when coastal wind moves loose sand. They can change quickly, so a photograph taken in the morning may not be possible later in the day.
Low, angled light is especially useful. In the late afternoon, shadows reveal slight changes in the sand’s surface. A ridge can become a strong line between light and shade. A distant person can provide scale, making the dune feel larger without taking over the image.
This is also a useful place to try negative space, the intentional empty area around a subject. Decide how much sand or sky you need. With a smartphone, begin by moving the dune ridge away from the exact centre of the screen. Compare a frame with more sky against one with more textured sand.
Wind creates practical problems as well. Sand can enter camera controls, lens mechanisms and phone ports. Avoid unnecessary lens changes, protect equipment and clean it carefully afterwards. Heat, cold and strong coastal wind can also affect the experience.
Follow marked boundaries and local conservation guidance. The changing surface is part of the landscape you came to photograph, not an invitation to ignore protected areas.
9. Aso-Kuju Highlands: Where to See the Milky Way in Japan
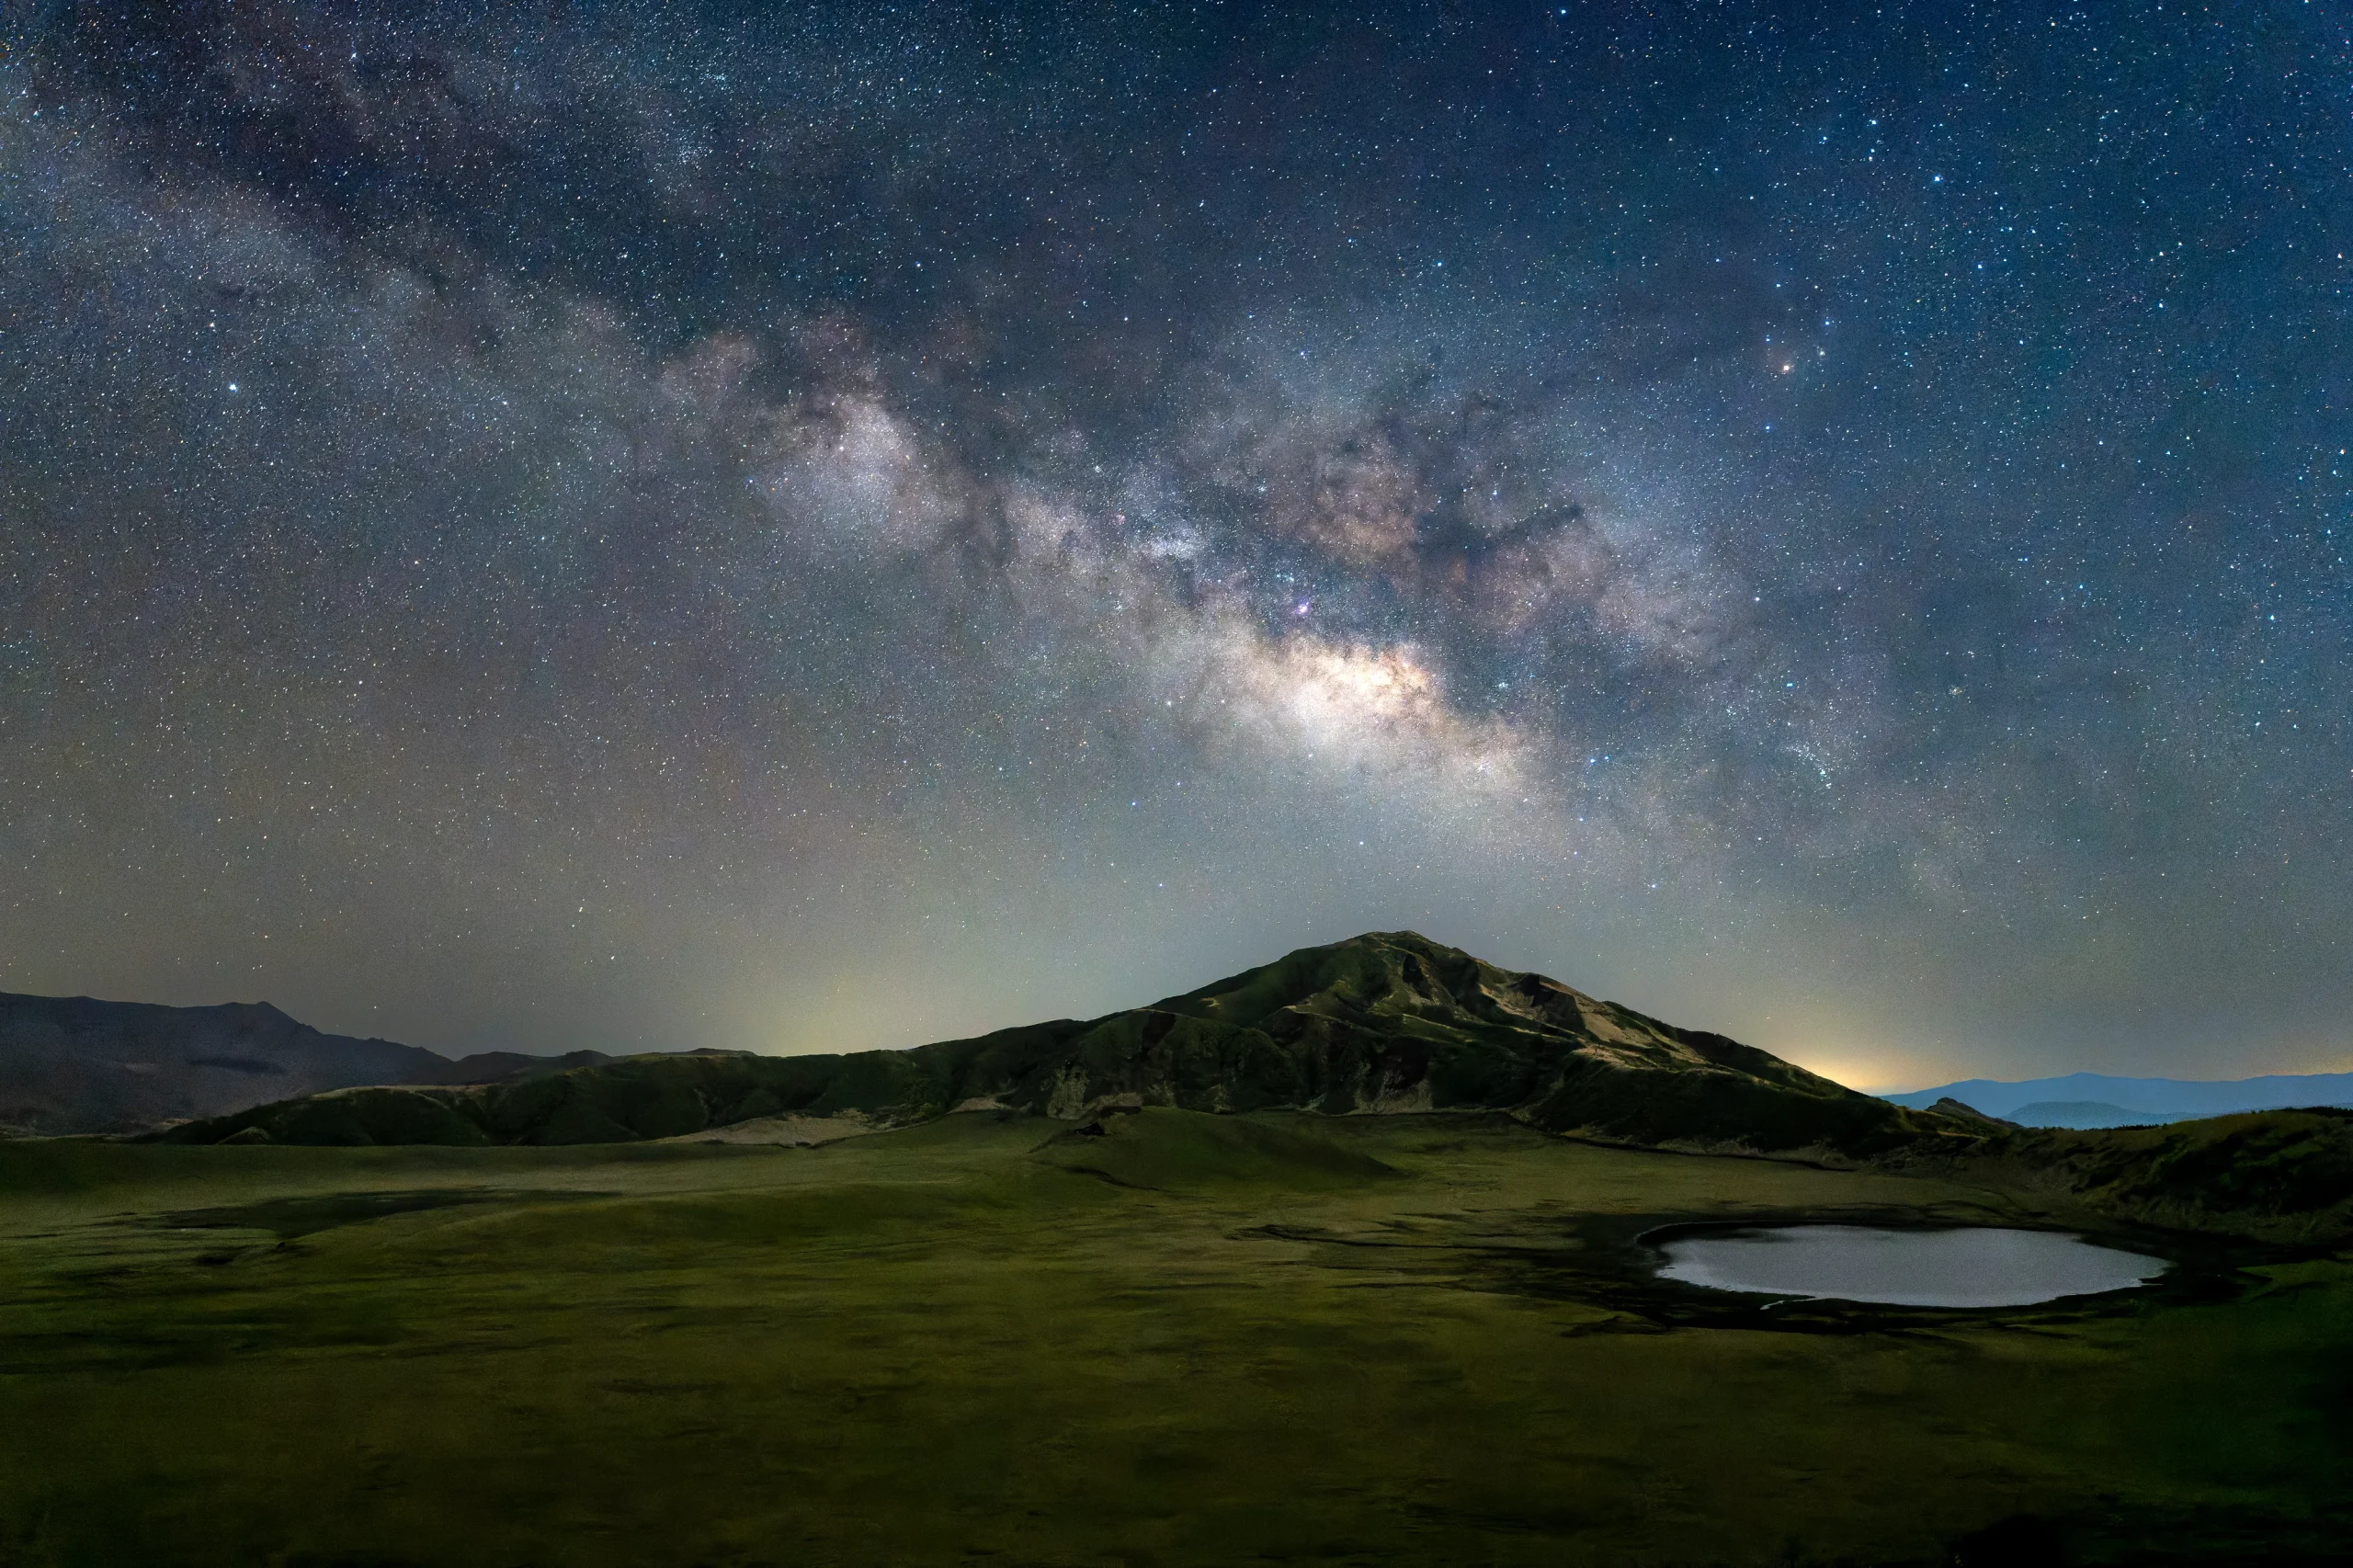
For travellers wondering where to see the Milky Way in Japan, the Aso-Kuju highlands offer the possibility of combining a dark night sky with one of Kyushu’s most distinctive volcanic landscapes.
Aso-Kuju National Park includes volcanic mountains, broad grasslands and the large Aso caldera landscape. Around the Kuju highlands, mountain ridges and grassland can frame a night-sky photograph. Choose a permitted location away from bright lights, then consider the weather, moonlight and local conditions.
The Milky Way is the pale band of concentrated stars visible when we look through the disc of our own galaxy. Photographing its brighter central region requires more planning than simply finding somewhere dark.
Photographing the Milky Way Above a Volcanic Landscape
From spring, the brighter central Milky Way becomes increasingly useful for photography, first before dawn and later at night. July and August generally provide more convenient evening opportunities. By early autumn, it shifts west earlier in the night.
Winter skies can be exceptionally clear, but the bright central region associated with many summer Milky Way photographs is not visible in the same way. These are seasonal guides, not guarantees. Moonlight, cloud, humidity, haze and artificial light can all change what you see.
For experienced photographers, a wide lens, tripod and RAW files offer useful flexibility. For beginners, the more important decision is the foreground. A dark mountain ridge or open grassland can establish the landscape without requiring a complex composition.
Make Safety Part of the Photograph
Night photography in a mountain landscape should begin before sunset. Check where you will stand, how you will return, where the nearest facilities are and whether the location is actually open at night.
Where possible, use accommodation with stargazing facilities, an observatory, an official event or a local guide. This removes much of the uncertainty involved in entering an unfamiliar rural area after dark.
Carry warm clothing even outside winter, together with rain protection, water and spare power. A dim red light can help you see nearby equipment while affecting night vision less than a bright white torch.
Never enter pasture, farmland, private roads or protected grassland to find a darker foreground. A successful Milky Way photograph begins with a location where you can stand legally and safely.
Before travelling, check Kumamoto Prefecture’s disaster updates and the latest volcanic alerts and access restrictions for Mount Aso. Confirm road conditions and opening arrangements with your accommodation or guide, especially for visits after dark. Choose locations that are open to visitors and follow local instructions.
Photography Etiquette in Japan: The Practice of a Respectful Observer
Good photography does not begin by taking more space. It begins by noticing when to step back, remain quiet and wait for the light.
This principle matters because many visually interesting places in Japan are also homes, workplaces, farms, sacred spaces or protected environments.
Give People and Daily Life Enough Space
Do not enter private gardens, fields, narrow farm tracks, working waterfronts or other private areas for a photograph. Keep entrances, bridges, steps and paths clear, especially when using a tripod.
When a resident, shopkeeper, craftsperson, farmer or fisher becomes the identifiable subject, rather than an incidental part of a wider scene, ask before photographing them. A longer lens does not remove the need for consideration.
Treat Sacred and Natural Places as More Than Backgrounds
A temple or shrine is first a place of worship. Check signs for restrictions on photography, flash and tripods. Do not interrupt prayers or ceremonies.
The same principle applies in nature. Stay on designated routes and respect ropes, fences and protected areas. Moss, grassland, flowers, wetlands and dunes can be damaged when visitors step beyond established paths in search of a cleaner composition.
Check Before Flying a Drone
Never assume that an open landscape means drone flight is permitted. Japan has national aviation rules, while parks, temples, local authorities, private landowners and individual facilities may impose additional restrictions.
Check the rules for the exact place and date before travelling with the intention to fly. If permission is unclear, keep the drone grounded.
Respect is not separate from travel photography. It is part of learning how to observe a place carefully enough to photograph it well.
Leave Room in Your Itinerary to Look Again
It is not emptiness or secrecy that makes these lesser-known spots worth seeking out, but the attentiveness they demand — an eye for conditions too easily lost when hurrying between famous sights.
Rain can deepen the timber in Narai-juku. Mist can shorten the visible distance along Hakone’s Old Tokaido Road. Wind can erase a reflection at Lake Tanuki, then create an entirely different pattern across the water. Late light can turn a simple ridge of sand in Tottori into the strongest line in the frame.
You do not need all nine places in one journey. Choose two or three that fit your season, route and interests. A guide, taxi, private vehicle or well-placed overnight stay can make rural, coastal and night-time photography easier to include without rushing.
A tailor-made journey with ENJYU JAPAN can build these slower photographic detours around the places you already want to visit, rather than forcing your journey into a fixed list of viewpoints. When you plan your Japan itinerary, leave one unhurried hour beside the famous sights. That small space may lead you to the photograph—and the local story—you remember most clearly.
Reference
- GO TOKYO – Yanaka & Nezu: Neighbourhood Highlights and Transport Access
- Odakyu Hakone – Kyukaido Ishidatami (Old Tokaido Highway): Historic Stone Paving and Bus Access
- Fujinomiya City – Lake Tanuki: Mount Fuji Views, Lakeside Activities and Visitor Facilities
- Narai-juku Tourism Association – About Narai-juku: Nakasendo History and Traditional Architecture
- Gujo Hachiman Tourism Association – Sightseeing in Town: Historic Streets, Waterways and Walking Maps
- Kyoto Prefecture Tourism Federation – Amanohashidate: Coastal Landscape, Walking and Access
- Ine Town Tourism Association – About Funaya: Boathouse History and Present-Day Uses
- Nara National Research Institute for Cultural Properties – About Asuka Historical Museum: Ancient Asuka’s History and Culture
- Asuka Tourism Association – Access and Local Transport: Buses, Cycling and Parking
- Tottori Sand Dunes Visitor Center – Visitor Guide: Sand Patterns, Natural History, Maps and Facilities
- Visit Oita – Kuju Plateau: Volcanic Landscapes, Stargazing, Photography and Access
- Ministry of Land, Infrastructure, Transport and Tourism – Flight Rules for Unmanned Aircraft: Registration, Permissions and Operating Requirements